

A page catches on the central bend of the calendar hanger when there is no notch under it or the notch does not line up with the gap in the wire. Punch the same semicircular notch at the centre of the edge through every page, the cover and the backing board, cut the wire into two sections either side of it, and lay the hanger arms inside the wire before closing it. Before the run, hang a sample and turn every page.
Why a gap in the wire is not enough
The hanger's straight arms sit inside two sections of twin-loop binding wire. As you turn a month, the page edge passes the hanger's central bend. Any paper left in that path hits the metal and bends.
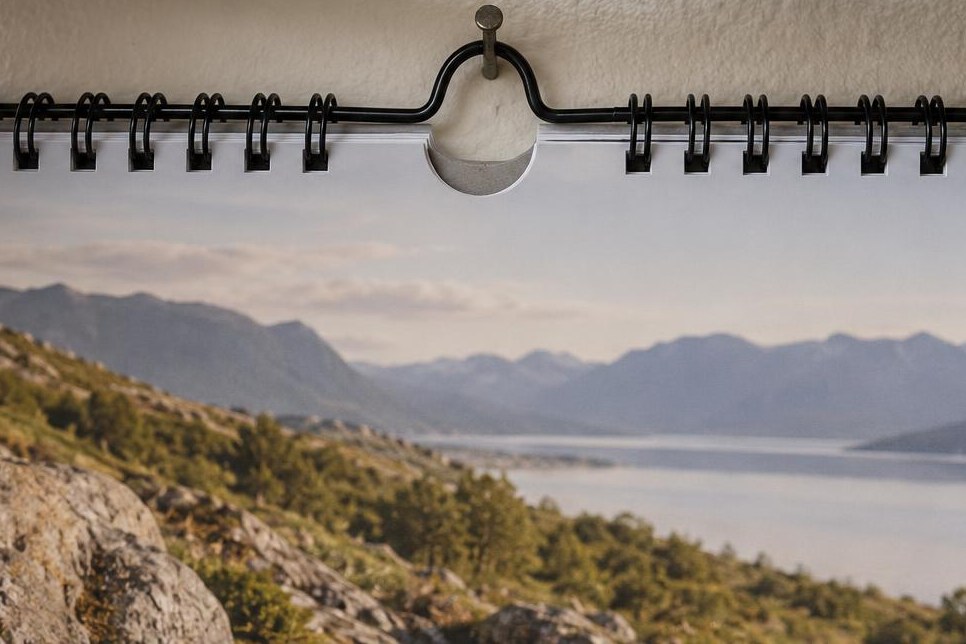
Right: a semicircular notch under the hanger bend and the wire cut into two sections: the page has room to pass.
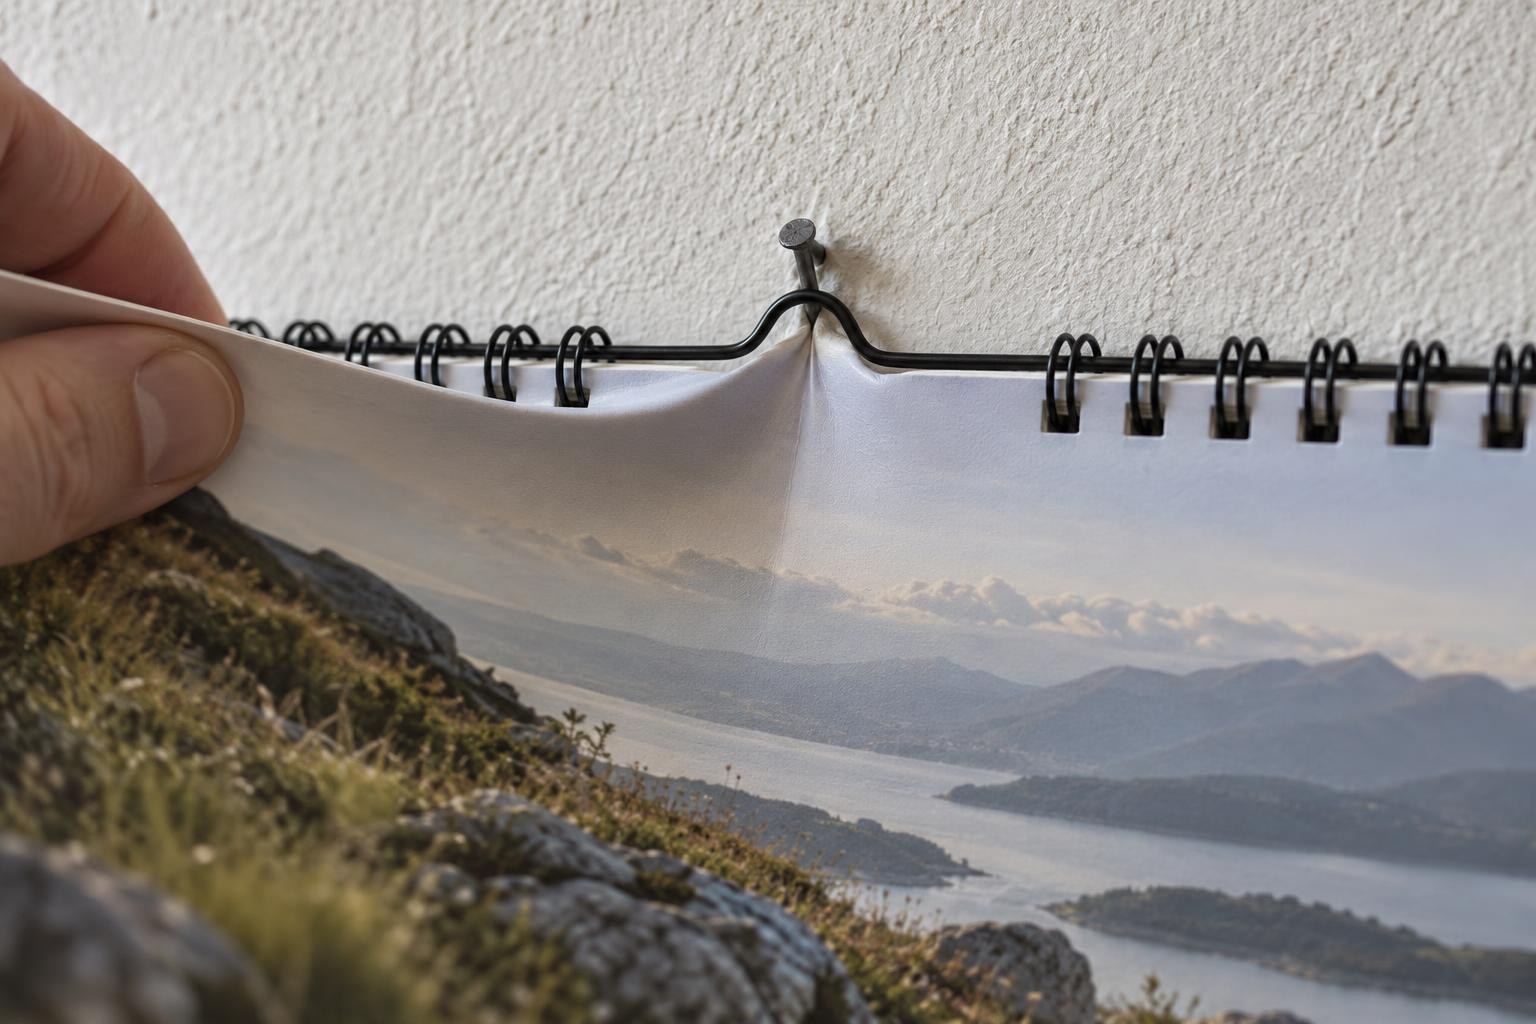
Wrong: no notch, so the page hits the hanger bend and creases.
A gap in the binding removes wire from the path, but leaves the paper. A round hole below the binding also leaves a bridge of paper. This hanger arrangement needs a notch that opens onto the edge.
Clearance in the middle
Calendar's top edge, front view
Hanger bend
Leave the bend between the two wire sections, with the notch below it. The hanger arms run inside the binding wire.
Find the centre on a test sheet
Trim the sheet to its finished size and measure the binding edge. Divide that width by two and mark the midpoint.
For the sample calendar:
Notch centre
½ edge
210 mm → 105 mm; 297 mm → 148.5 mm
Punch per stroke
up to 25
sheets of 80 g/m²; fewer if heavier
3:1 wire
Ø 6.4–7.9 mm
by block thickness incl. backing
Hanger shorter than the edge by
3–6 cm
210 mm → 150; 297 mm → 250
Punch capacity from the WB Calendar 930 card. Ø 6.4 mm wire holds up to ~35 sheets of 80 g/m², Ø 7.9 mm up to ~55 (MyPrint wire cards). MyPrint hangers come in 150, 200, 250 and 300 mm.
Use a calendar binding machine with a semicircular punch: a standard row of binding holes cannot replace the notch. At MyPrint this is the WB Calendar 930: up to 25 sheets of 80 g/m² per stroke. Punch heavier paper one sheet at a time first, then in small batches: the 25-sheet rating is for 80 g/m² paper, not card.
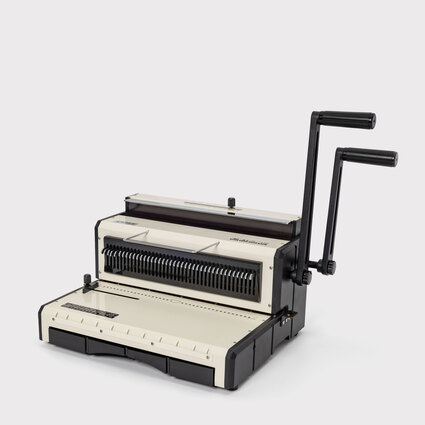
My Print WB Calendar 930 calendar binding machine
37 holes for 3:1 wire plus a semicircular hanger notch · up to 25 sheets of 80 g/m² per stroke · F4, A4, B5, A5
Using one sheet of the actual paper, adjust the guide until the notch meets your centre mark. Hold the hanger against it and move the sheet edge past the bend: the paper should neither rub nor bend. If the paper touches the bend, check three things: the notch sits exactly under the bend, both wire sections are equal, and the bend stands straight, not tilted sideways. MyPrint hangers are made for the WB Calendar 930 notch, so look for an offset first.
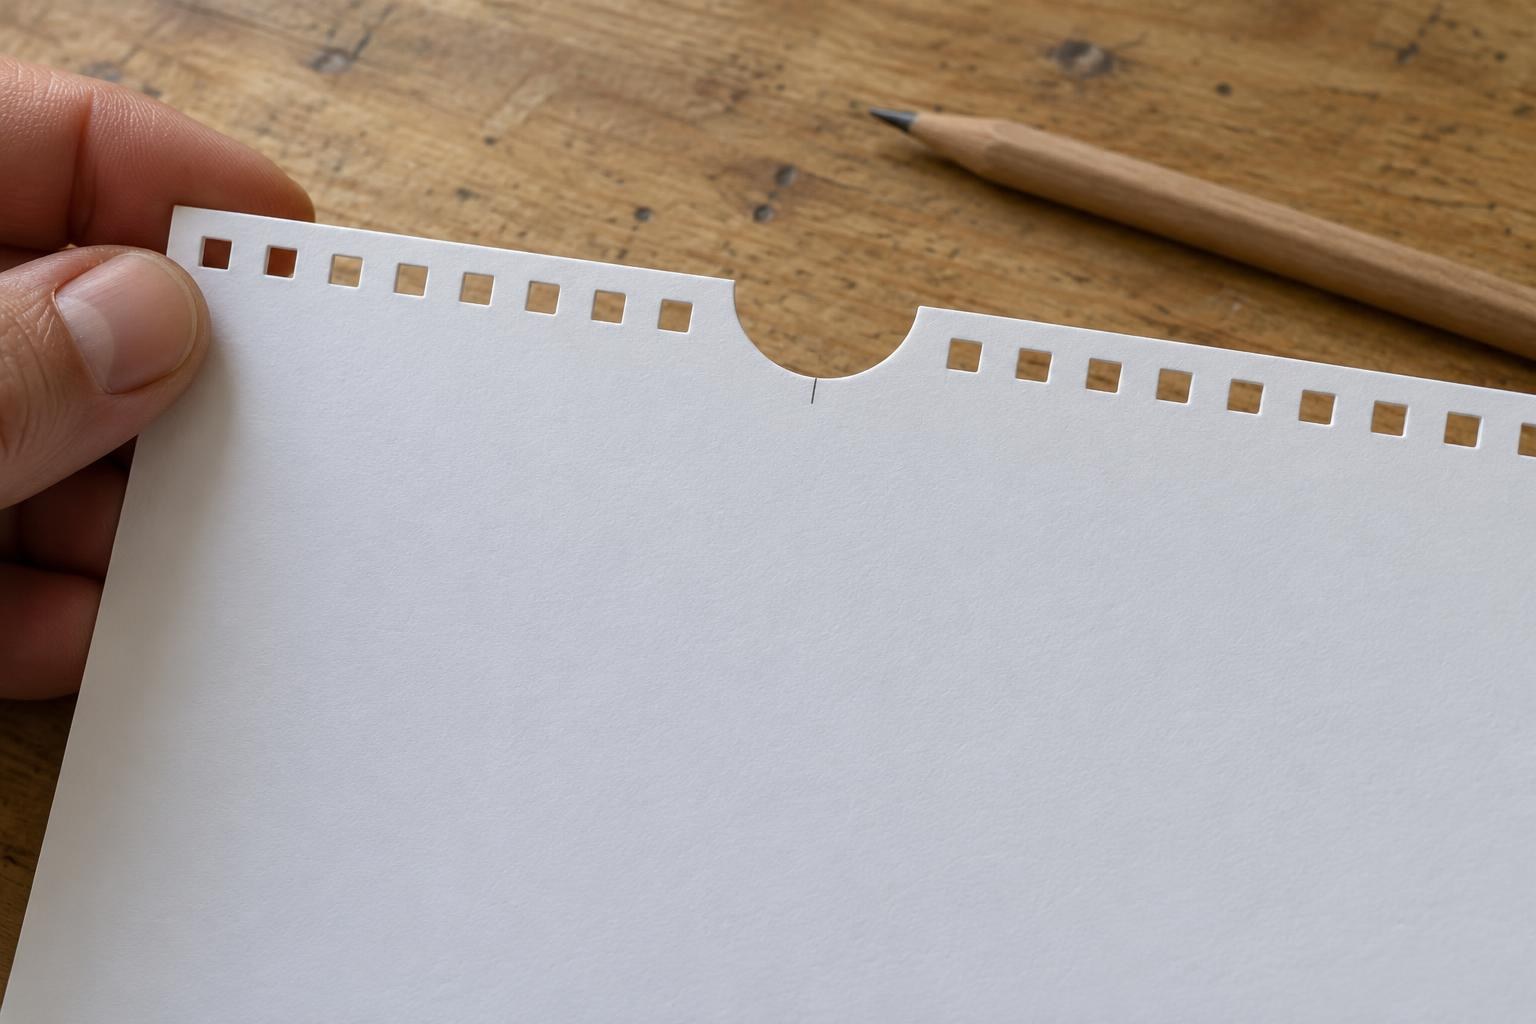
Test sheet: the notch centre sits exactly on the pencil mark at the middle of the edge.
Repeat the notch through every layer
Punch the pages, cover and backing board with each batch against the guide by the same edge as the sample, and leave the guide alone between batches. Align a wider cover with the pages as they will sit in the calendar, not by a scale reading. Punch a stiff backing board separately, one at a time: if the handle goes stiff, do not force it — use a thinner board.
Stack the layers: their notches should form one smooth curve with no steps or paper bridges. Replace a misaligned sheet with a new one punched at the same guide setting as the successful sample. Lay the printed artwork over that sample: numbers and labels must stay clear of the notch and binding holes.
Leave a clear gap in the binding wire
Count the holes to the left and right of the notch. Use wire cutters to cut two sections with the corresponding number of loops. Hold them against the sheet: no loops or cut wire ends should project into the central clearance gap.
Load the block onto both wire sections. Before closing them, place the hanger's straight arms inside the wire, with its bend centred on the notch. Close the wire in the binding machine's closer. Hang the sample and turn every page and the cover.
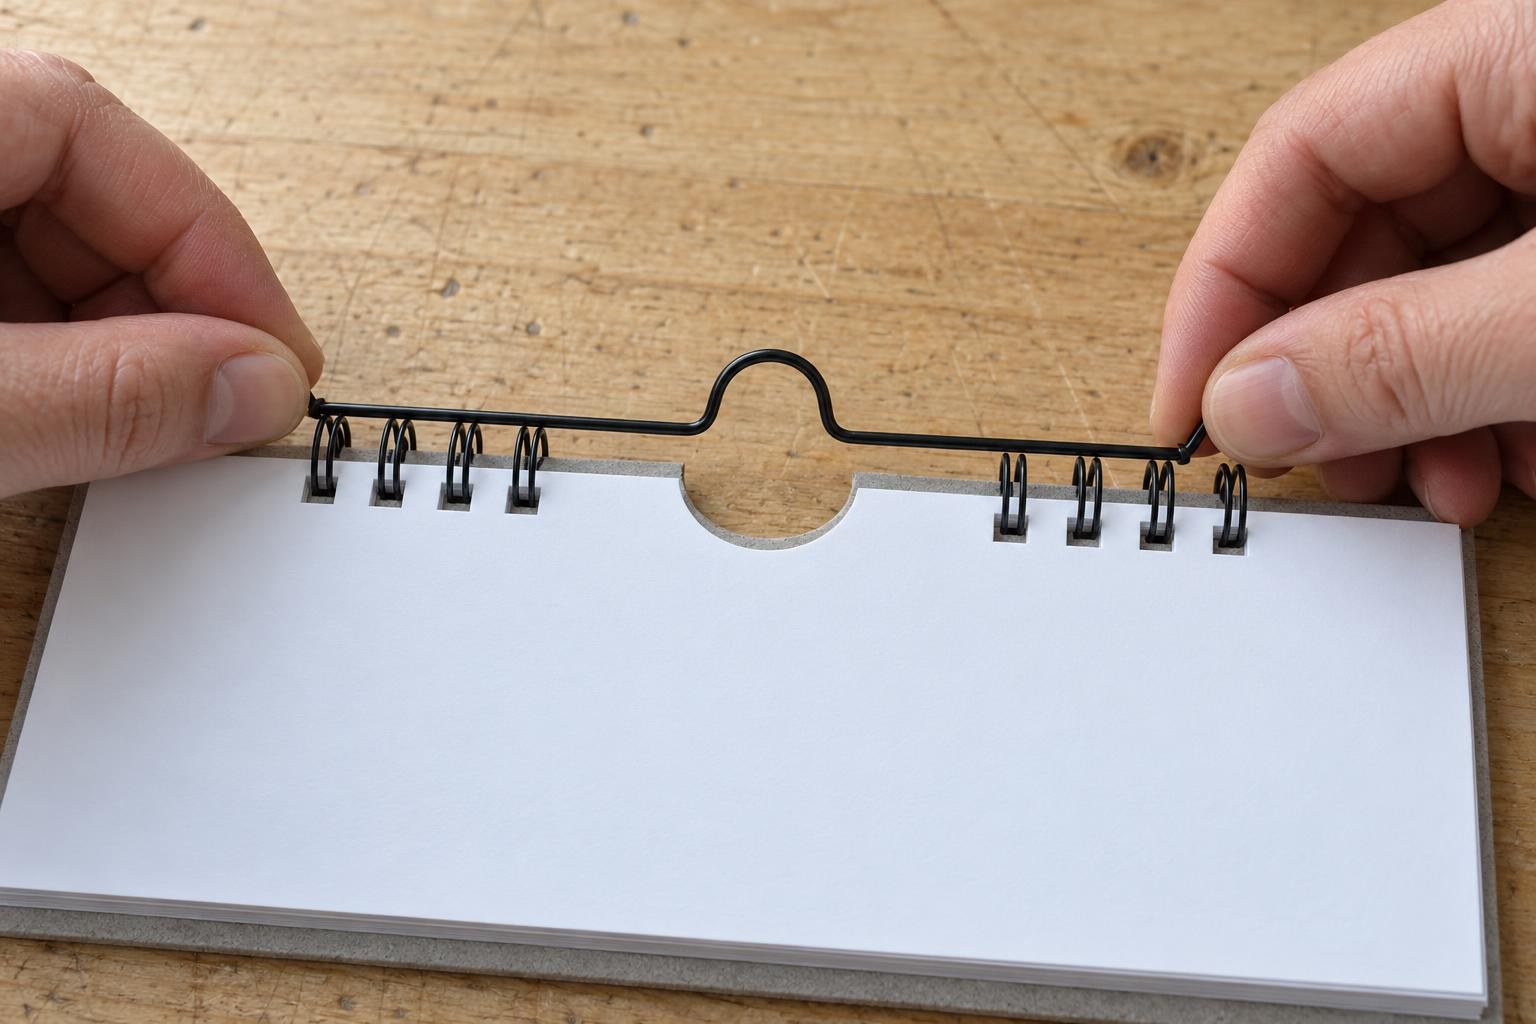
The hanger goes in before closing: its arms into the open loops of both sections, its bend over the notch.
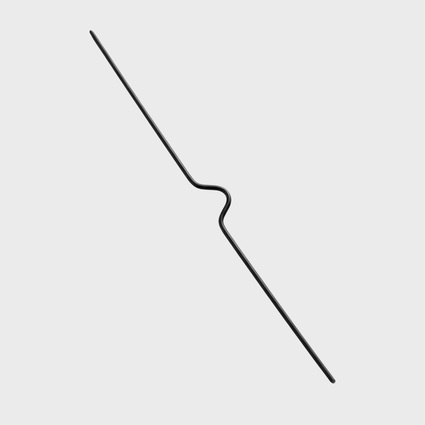
Calendar hanger, 250 mm, black
Spring wire · pack of 100 · also 150, 200 and 300 mm, black or white
Locate the catch, then correct it
| What you see | What to do before the run |
|---|---|
| Every page catches in the middle | On a sample without wire, align the notch with the hanger bend and remove any extra loops from the gap. Move the page past the hanger again. |
| Only one layer catches | Lay it over the successful sample. If its notch is missing or offset, replace that part and punch it to match the sample. |
| The whole edge is stiff; the hanger area is clear | Look at the loops end-on: wire squeezed into an oval drags along the whole edge. How to set the closer so the loop stays round is explained in ‘Pages fall out of the wire binding’. If the loops are round but the block fills the wire tightly, use a larger diameter. |
Keep the successfully notched sheet and record the guide position. Start the run once every layer of the sample passes the hanger without catching; compare each batch with the sample.
Frequently asked questions
How long should the hanger be?
Choose one 3–6 cm shorter than the binding edge: 150 mm for a 210 mm edge, 250 mm for 297 mm, and 300 mm for 330 mm. MyPrint offers 150, 200, 250 and 300 mm hangers.
Can I insert a hanger into an already assembled calendar?
No: the hanger arms must sit inside the wire, so insert it before closing. Do not reopen closed wire — the loops will no longer close round; rebind the block with new wire.
How can I make the notch without a calendar binding machine?
For a few copies, cut it with a sharp knife using a template, but the notches in the layers can easily become misaligned. For a production run, use a machine that punches the notch together with the binding holes: at MyPrint, this is the WB Calendar 930.
Which binding wire should I use for a calendar?
Metal 3:1 wire. For 12–13 sheets and a thin backing board, Ø 6.4 mm usually suffices (up to ~35 sheets of 80 g/m²); for heavier paper and a thick backing board, use 7.9 mm (up to ~55). Cut it into two sections on either side of the notch.