
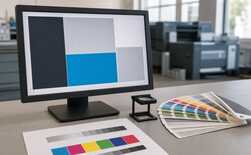
Artwork preflight starts not with a universal settings list but with an exact output description: technology, finished size, material and finishing operation. Then check the file’s geometry and content, open it in the RIP or software that will actually run the job, and finish with one of three decisions: accept, repair a controlled copy, or return the file with a specific reason.
First record the output for which the file is being checked
The same PDF can be suitable for one process and unsuitable for another. Before opening the artwork, record the finished size, printing or transfer method, material and its colour, application side, need for white or another special layer, and post-print operations: cutting, laminating, assembly or installation.
If these two parts do not agree, an automated check has no success criterion. A preflight profile is a set of defined checks and fixes, not proof of suitability by itself; this is explicit in Adobe Acrobat’s description of Preflight profiles.
Match the page, finished size and scale before judging quality
Compare the size. Match the page or artboard size to the finished product. Do not rely on the file name or viewing zoom.
Check the boundaries. Take bleeds, safe areas, marks and allowances from the requirements of the exact cutting, finishing or installation process; do not copy a number from another technology.
Judge raster content at final scale. Review effective resolution, sharpness, halos and artefacts after the required enlargement. The selected process and viewing distance set the requirement.
Match the orientation. Check mirroring for transfer, the face side, page order and material direction wherever they affect the result.
Check fonts, images and transparency as production objects
- Fonts: make sure all text displays correctly and has not been substituted. Embed or outline fonts only under the receiving-process rules, and preserve an editable original.
- Images: find missing links, low effective resolution, unwanted backgrounds and damaged masks.
- Transparency and effects: review edges, shadows, masks and overprints after export and after RIP processing. Content that looks clean in the editor may rasterise differently in the receiving chain.
- Colour: record the colour space, profile and assigned special colours. Do not convert the file “just in case” until the output profile is known.
An automated fix creates a new file that must be checked again. It may remove a formal mismatch while changing the appearance, so do not overwrite the source version.
The special layer and contour must appear in the receiving software
A visible white object does not prove that a white printing plate exists, and a thin line around an image does not prove that the plotter will treat it as a cut path. The spot-colour name, contour type, layer order and overprint rules depend on the exact RIP, printer or plotter.
Finish the check with one decision and keep an audit trail
Accept. The file matches the recorded order, passes the profile for this exact workflow, and the required layers and contours are recognised. Save the checked version and its RIP preview.
Repair a controlled copy. The cause is unambiguous, the change does not alter the agreed content, and you have the competence to verify the result again. Record what changed.
Return. A source, font, resolution, agreed geometry or special-layer rule is missing, so correction would require guessing the intent. Name the object, risk and answer required.
Do not run the file if it was checked for the wrong output, the production software did not recognise the required layer or contour, an automated fix was not rechecked, or a digital preview is substituting for a physical proof of critical colour and material.
After the contour is ready, choose equipment for the real material
If the workflow includes contour cutting, the next decision is no longer about graphics but about plotter compatibility, material width, marks and the required operation. The current MyPrint section combines cutting plotters and materials, but check the exact model against its instructions and your test file.
Go to MyPrint plotters and cutting materialsFor printing without cutting, this route is unnecessary: finish preflight with the requirements of the exact printer, RIP and material.