

Do not lighten the file straight away. First print three identical photos and compare them: uncoated, under gloss and under matte cold-laminating film. Choosing a different finish is often enough. Edit the file only if the required finish still darkens the photo, and only a copy of the artwork, using a test strip.
Colour can change without heat
Film changes how light reflects off a photo, so the same print looks different beneath it. This happens with cold film too: the effect comes from the film itself, not from heat.
What sits above the image
GlossCan increase saturation and deepen shadows. Check that shadow detail remains visible.
MatteDiffuses glare, but can mute colours. Check whether you like the result.
Cross-section of one side of a cold-laminated photo card, with the release liner removed.
A pink or yellow stain on a white area after a pouch laminator pass is a different problem. Do not heat that piece again. Let a new print dry for a day and laminate it with cold film. Thermal laminating film will not bond on the cold setting; this test needs self-adhesive film.
Compare three identical prints
Choose a photo with a face, a grey object and shadow detail. Print three 10 × 15 cm copies on the same paper without changing any settings. Clear cold film comes in gloss and matte finishes, in A4 sheets. For a small photo, cut the portion you need with its liner still attached.
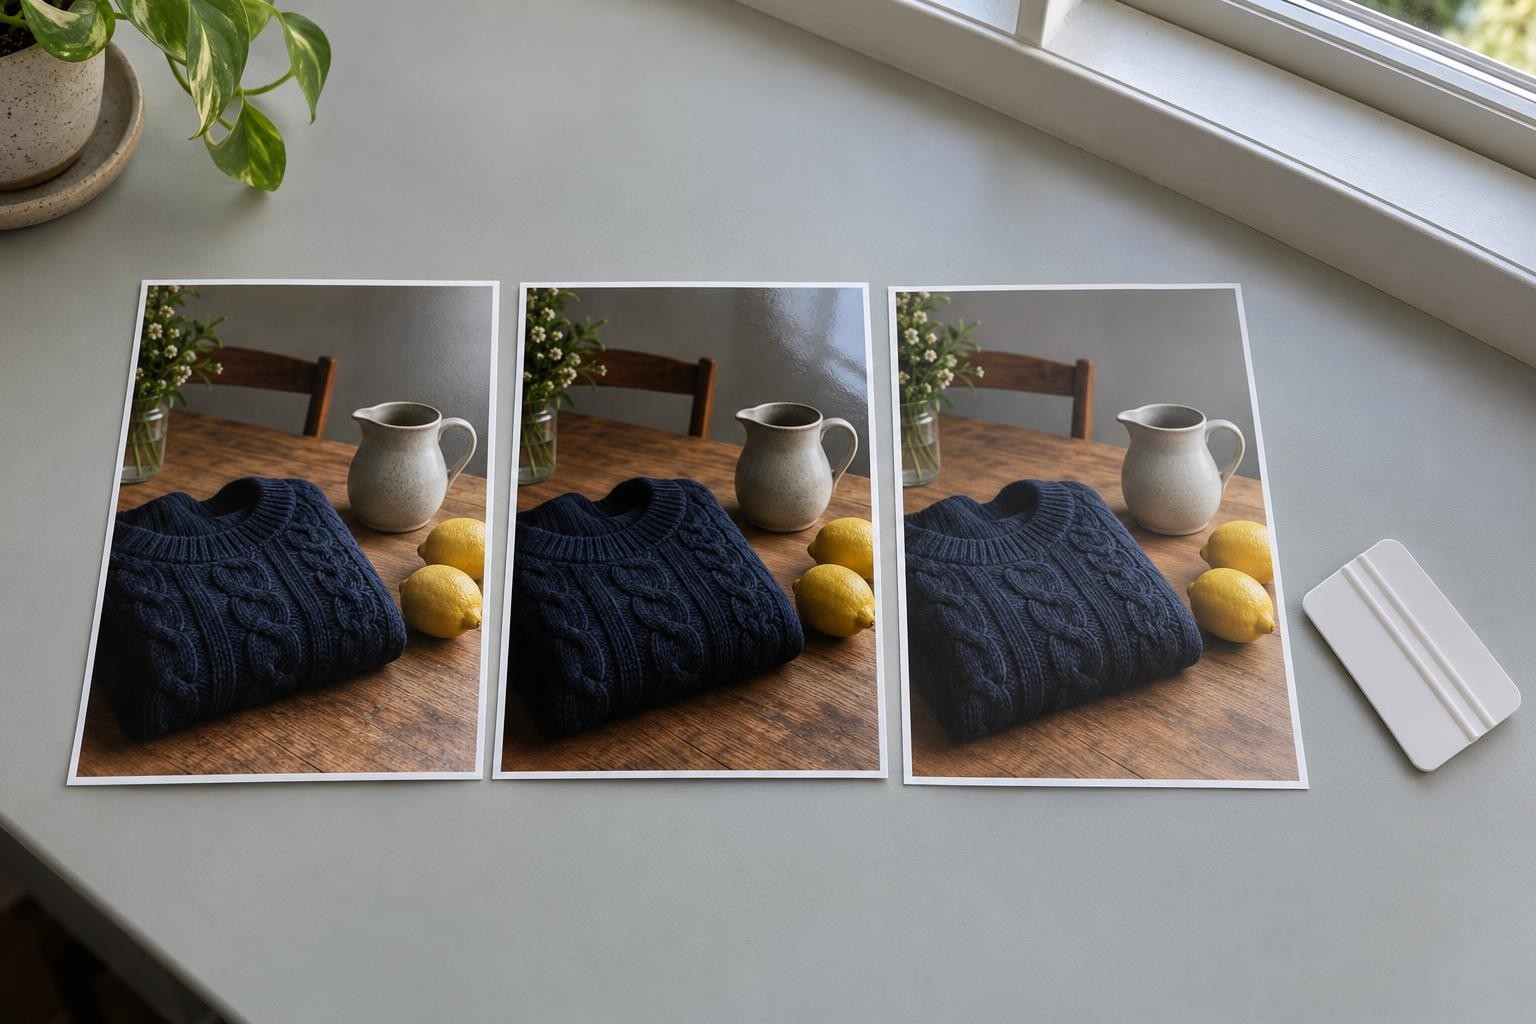
Three copies of one file: uncoated, under gloss and under matte film. Compare them side by side, under the same light.
Matte paper + gloss film
The strongest darkening: shadows and blacks become deeper. For a glossy finish, print on glossy photo paper; if you keep matte paper, compare it with matte film.
Glossy photo paper + gloss film
Colour changes the least. The file usually needs no editing: check the shadows on a sample.
Any paper + matte film
Blacks become lighter and colours more muted. If the photo looks flat, switch back to gloss rather than darkening the file.
With gloss film, the colour change on satin paper falls between that on matte and glossy photo paper.
Drying before film
24 h
under a sheet of plain office paper
Test
3 copies
uncoated · gloss · matte
Correction step
5 %
midtones; leave black alone
Comparison
side by side
same light, no glare
Inkjet photo paper with water-based ink, cold-laminating film.
Before applying film, dry the prints for a day under a sheet of plain office paper. For drying the print under a sheet of paper, see “Why glass clouds over a fresh photo”.

My Print gloss cold-laminating film, A4, 20 sheets
Clear and self-adhesive, no heat or laminator needed · A4, 20 sheets · matte also available (11637)
No film
Control
Leave the first copy uncoated. Use it to compare both finishes.
Cold gloss
Shadow detail
Apply clear gloss film to the second copy. Examine dark clothing and hair.
Cold matte
Saturation
Use unpatterned matte film on the third copy. Check whether the blacks have turned grey.
Place all three side by side under the same light so the lamp does not reflect off them. Compare skin tones, the grey object and dark clothing with the control. Save holographic and textured films for a separate test: they add their own effect.
Apply the film without heating
- On a clean, flat surface, remove dust from the dry print. Peel back 1–2 cm of liner and align the edge of the film.
- Press the edge down. Gradually remove the liner while smoothing the film with a clean squeegee, working from the centre towards the sides. Keep your fingers off the adhesive.
- Judge colour only where the film lies flat. If there are bubbles or creases, make a new sample.
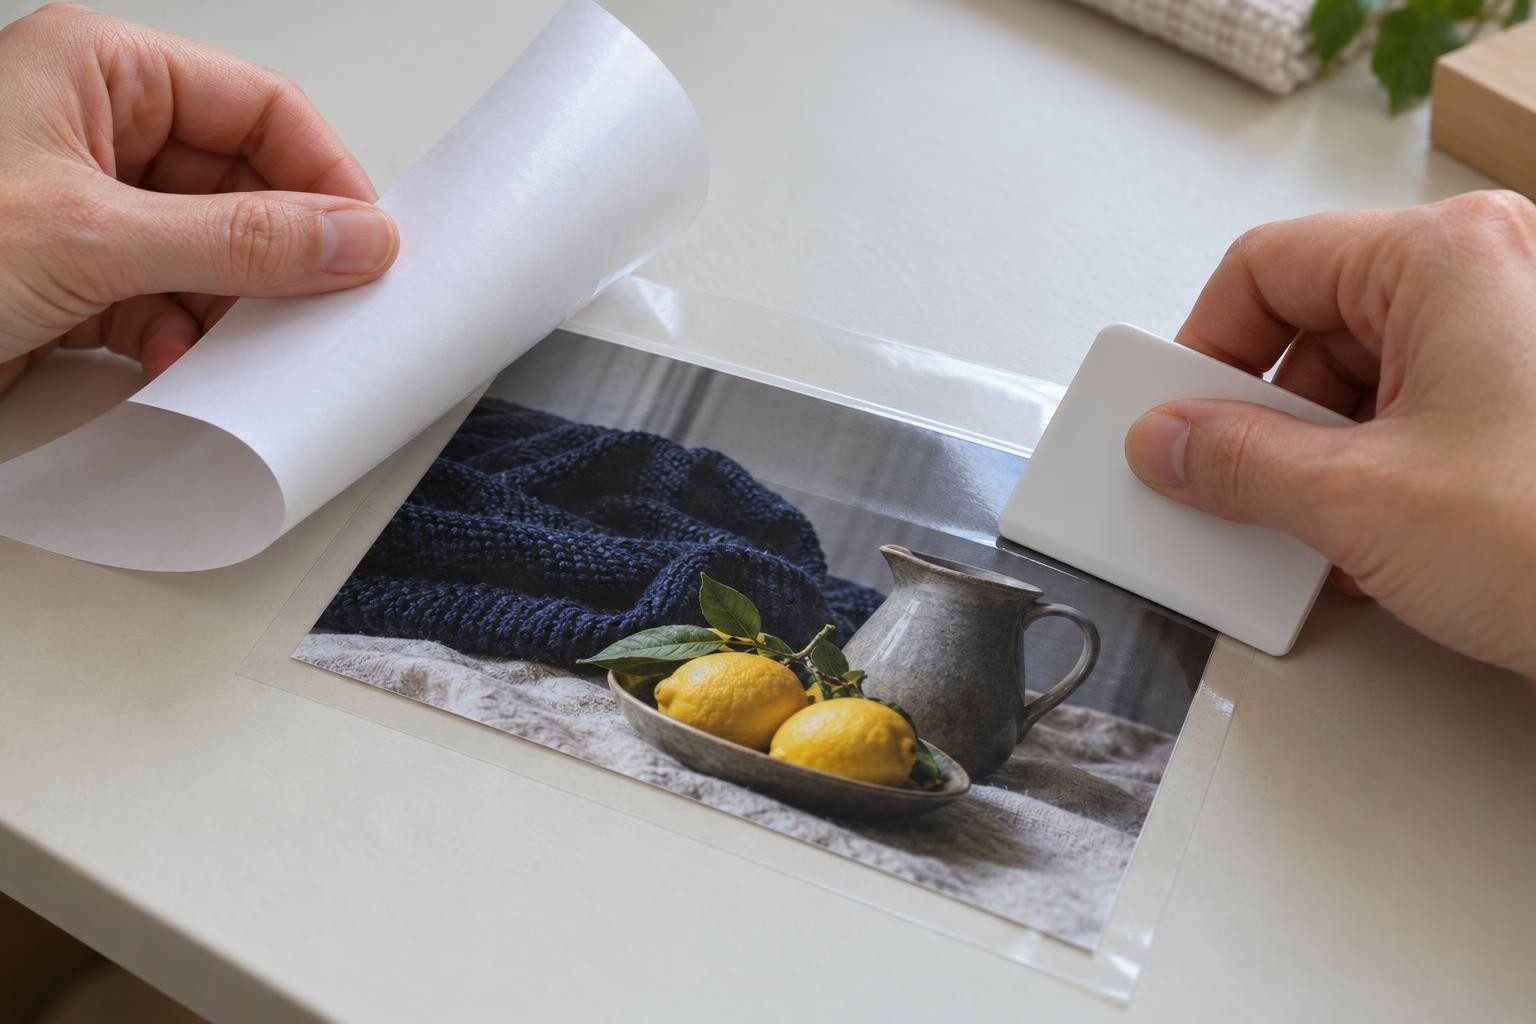
The film edge is already pressed down: peel the liner gradually and move the squeegee from the middle to the sides.

Scraper for self-adhesive film
Plastic scraper: smooths self-adhesive film without bubbles
When to change the file
| What you see | Next action |
|---|---|
| The control is dark too | Correct the printing first: select the paper type specified on its product card in the driver (for glossy MyPrint paper, “Glossy Photo Paper”) and print a new control. Then repeat the test with film. |
| You like one finish and detail is preserved | Choose that film, leave the file unchanged and keep the finished card as a reference. |
| The required finish makes the photo too dark or oversaturated | Make a test strip: four identical crops of the problem area on one sheet. If it is too dark, leave one unchanged and raise the midtones of the other three by 5, 10 and 15 % (in Curves, move the midpoint from 128 to 134, 141 and 147; leave black and white alone). If the colours are too saturated, reduce saturation by 5, 10 and 15 % instead. Let the strip dry, laminate it with the same film and pick the crop closest to the uncoated control. Apply that correction to a copy of the artwork. |
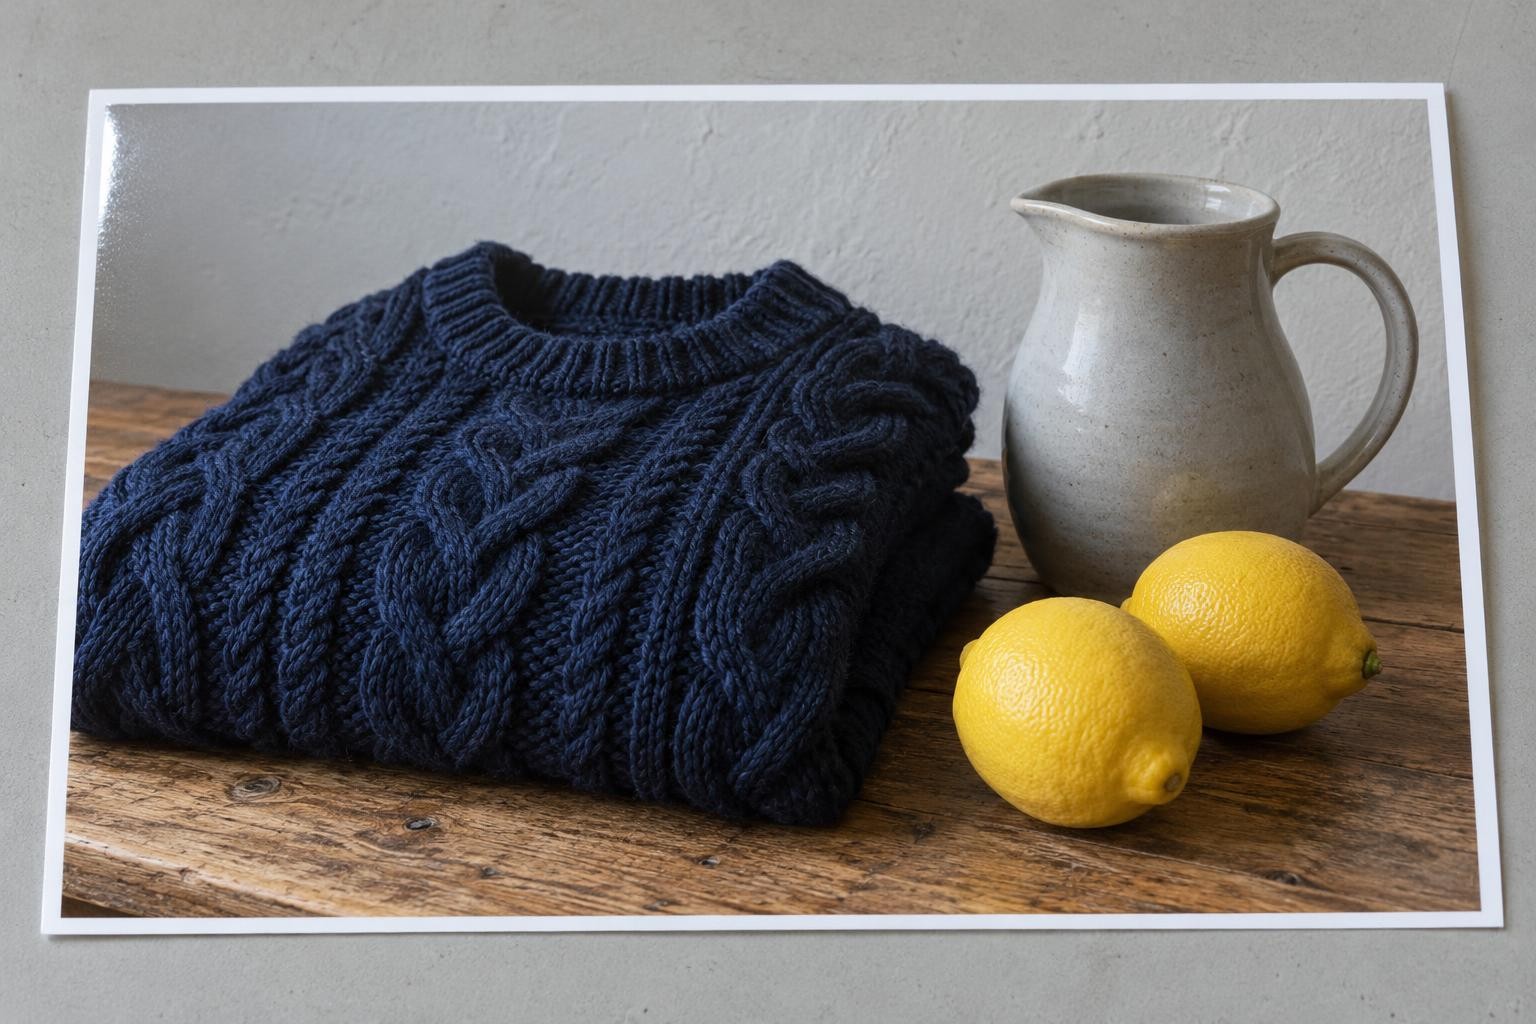
Right: under gloss film the shadows keep their detail: the knit shows in the dark sweater and the jug stays grey.
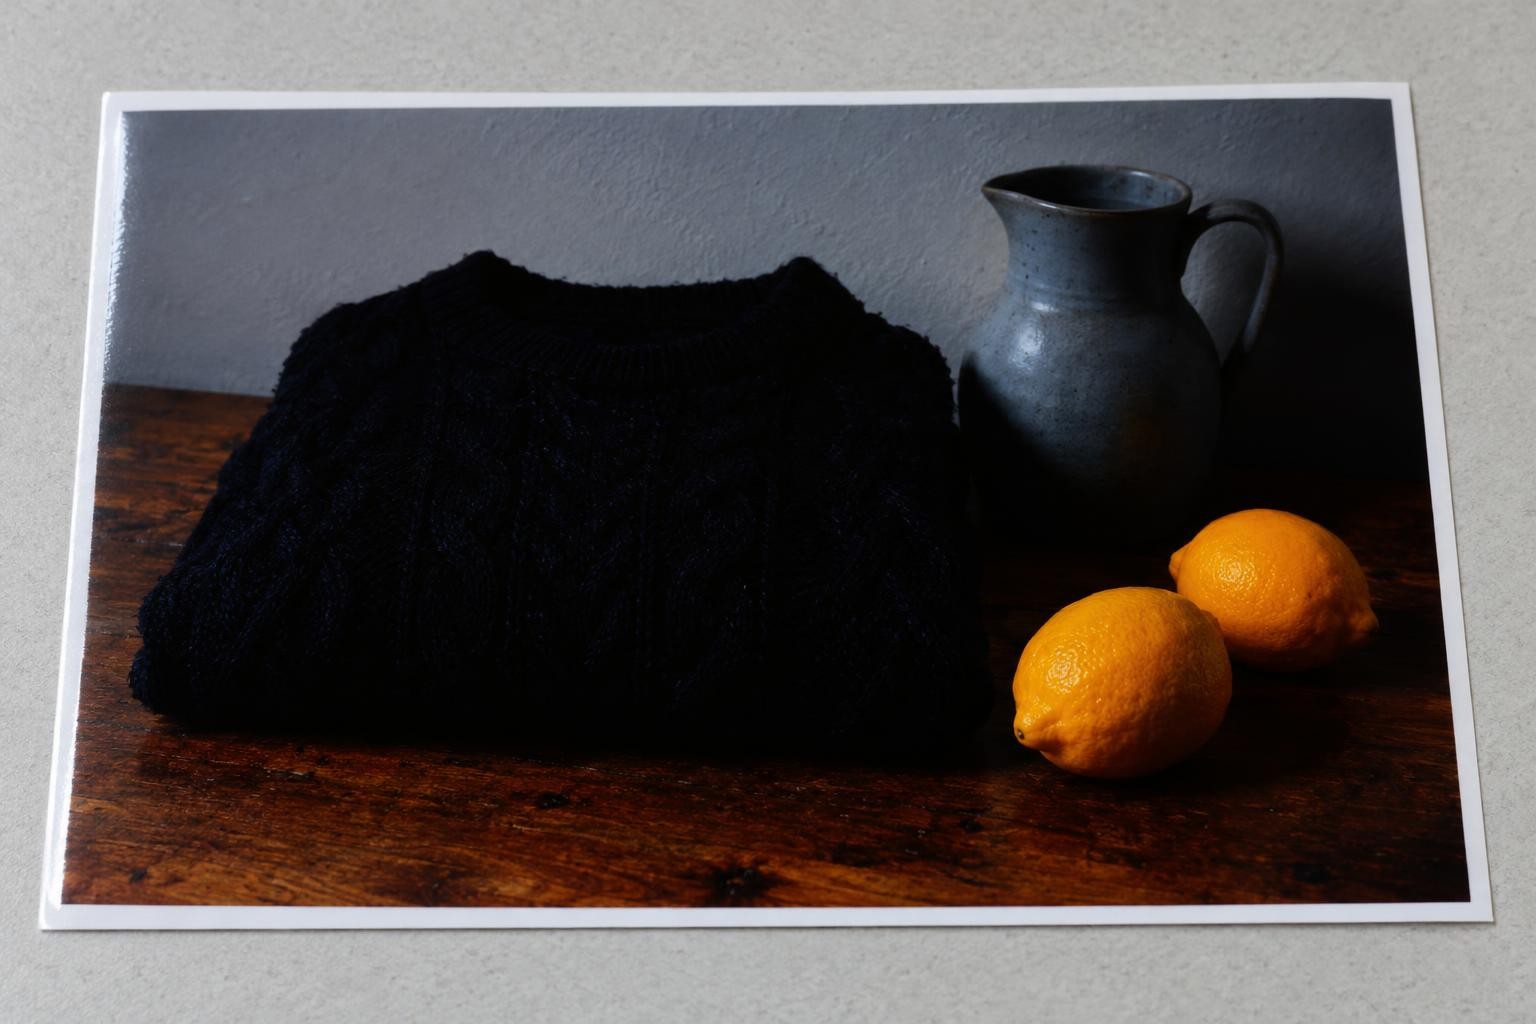
Wrong: the sweater has merged into a black shape and the lemons look orange: the finish darkens and oversaturates the photo.
There is no universal lightening percentage: it depends on the paper, ink and film. For regular orders, build the colour profile specifically for the laminated card. If you change the paper or finish, repeat the comparison before printing a batch.
Keep the approved laminated card as a reference, together with the paper and film names and the print settings.
Frequently asked questions
Can you laminate a photo straight after printing?
No. “Instant drying” on the paper card only means the print does not smudge. Before applying film, dry it for a day under a sheet of plain office paper, or two days for dark images.
Gloss or matte film for photos?
Use gloss for rich colours when the photo will not sit under a bright lamp. Use matte when glare makes the photo hard to see. Compare both on copies.
Can you laminate a photo without a laminator?
Yes, with cold film: it is self-adhesive. Peel back 1–2 cm of liner, press down the edge and smooth with a scraper while gradually removing the liner.
The photo is dark before lamination — what should you change?
A screen emits light, while paper only reflects it, so the print is darker than the screen. Set the driver to the paper type on its product card, such as “Glossy Photo Paper”, and print from an sRGB file. Then compare copies with and without film again.