

A white edge on UV DTF is the white underbase showing from under the colour. First remove any white outline and semi-transparent halo from the artwork: white is printed under them too. An even edge all around is fixed by choking the white layer — start at 0.1 mm; an edge on only one or two sides means misregistration, so align the heads first, then choke. Neither lamination nor firmer pressure removes an edge that is already printed.
What is showing beyond the edge?
A UV DTF printer prints the white underbase beneath the colour artwork to add opacity. Clear varnish sits on top. The underbase stays under the colour. A clear glossy rim is varnish: it is often printed slightly wider than the design.
Keep the white layer inside the colour contour
Cross-section of the decal on film A: the white layer is narrower than the colour, and the varnish slightly wider.
Inspect the edge right after printing: lay the sheet on black paper and look at the edge through a loupe or a phone camera. Printers with a built-in laminator, such as the My Print U300, cover the print with film B inside the printer, so look through it: it is clear. An opaque white strip is the underbase. A clear glossy rim is varnish; do not choke the white because of it.
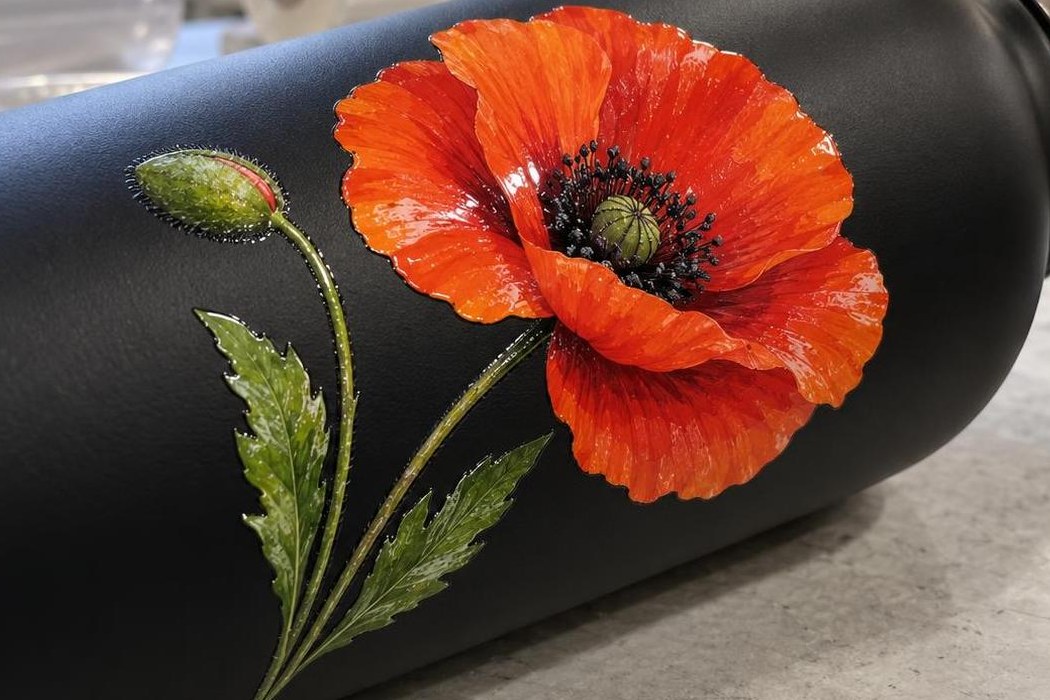
Right: the colour runs right to the edge, with only a thin varnish gloss around it.
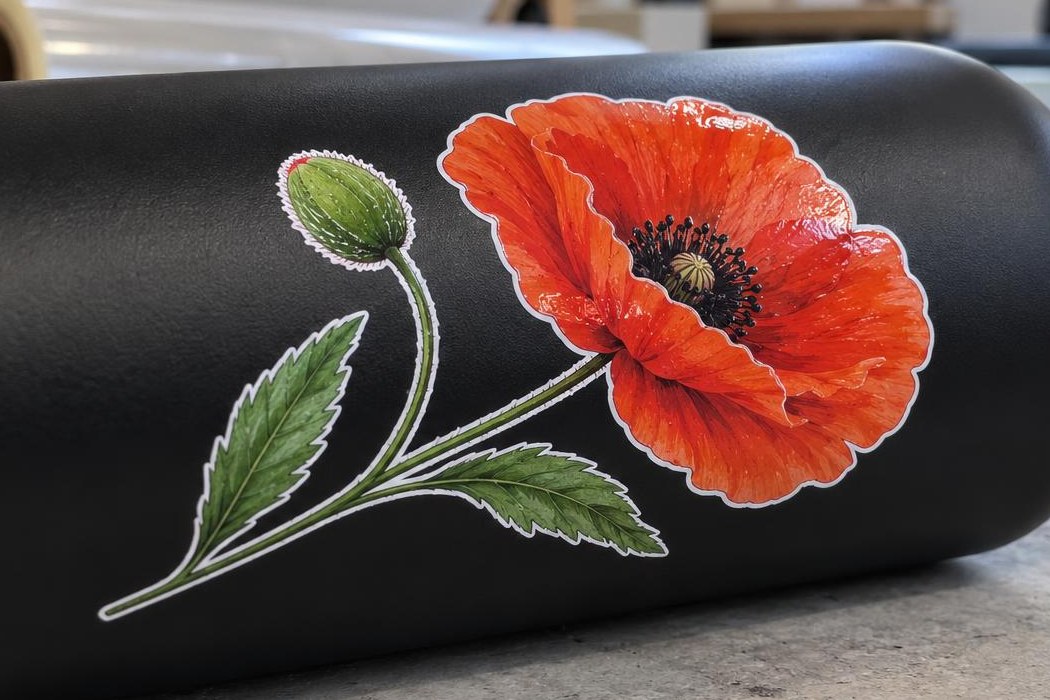
Wrong: an opaque white strip all around the outline is the underbase, and it needs a choke.
Check the file, then the direction of the fringe
Open the artwork against a dark background and zoom in on the edge. Remove any accidental white outline and leftover background pixels. Remove soft shadows or pale translucent halos if they are not needed in the design. Then open the white layer preview in your print preparation software: the software prints solid white under barely visible pixels too.
Look at where the white is exposed
An outline all around
Choke the white by 0.1 mm — see the card below.
A fringe at the left and bottom
Align first, then choke.
Top view: orange is colour, white is the underbase.
Contract the contour, not the white ink output
Choking moves the white layer's edge inside the design. Less white ink makes the underbase more transparent but does not move its edge, while a smaller design gives a smaller decal. Start with 0.1 mm on each side. If your software works in pixels, convert: 1 pixel = 25.4 mm ÷ resolution. In a 300 ppi file that is 0.085 mm, so 0.1 mm is about 1 pixel; at 720 dpi it is about 3 pixels.
White choke
0.1 mm
start for a regular design
Test step
+0.1 mm
edge still visible — one more step
Small text, thin lines
0–0.1 mm
more and they lose their white
Varnish past the edge
up to 0.25 mm
a clear rim is not a defect
Starting values for artwork at 1:1 scale. The final choke is decided by a test strip on your film.
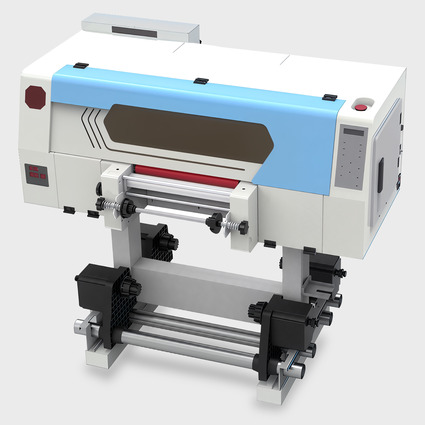
My Print U300 UV DTF printer, 30 cm
3 Epson I1600 heads · colour + white + varnish · printing and lamination in one cycle · MainTop 6.1 software
Make a short test strip on the same UV DTF film you will use for the job:
- Save the current settings. Take a section of the job with a solid fill and the thinnest line, at actual size.
- Print the original and a copy with the white choked by 0.1 mm. Keep the colour, white ink output and all other print settings the same.
- If the edge remains, add another 0.1 mm. If white disappears under the thinnest line, go back one step.
- Apply the better version to a blank of the same colour as the order. Check that no white protrudes, the colour edge has not darkened and fine details remain legible.
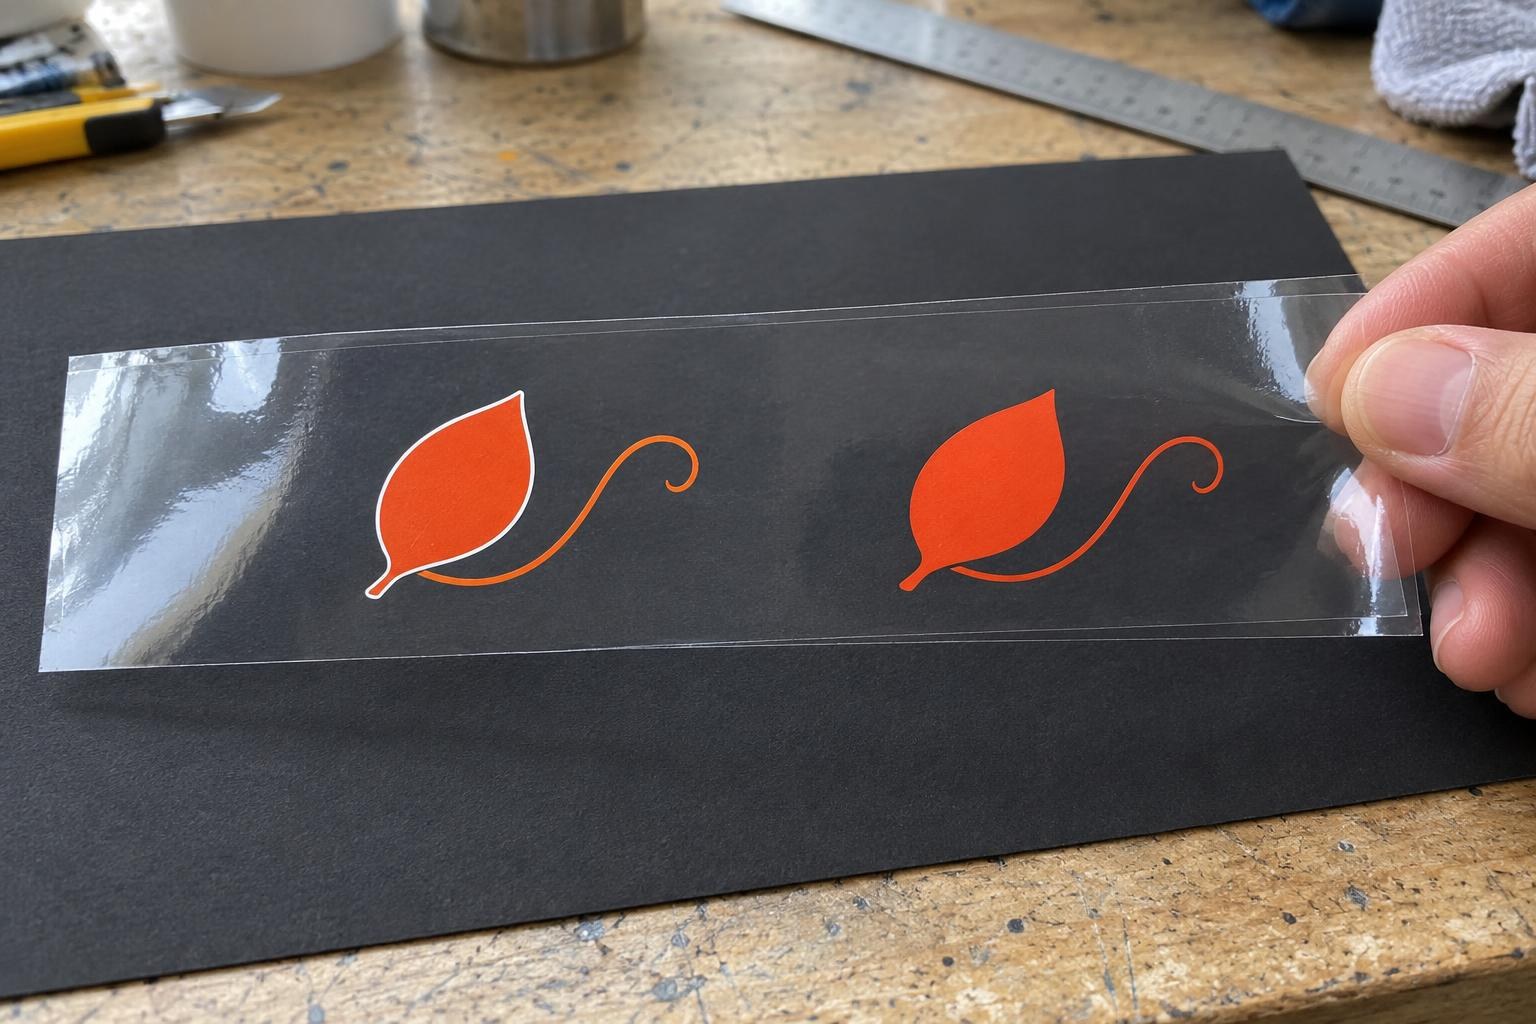
A test strip over black paper: the original settings with a white edge on the left, the copy with a choked white on the right.
Contraction removes white from both sides
A 0.6 mm line, choked by 0.1 mm on each side
0.6 − 2 × 0.1 = 0.4 mm
At the same choke, a 0.2 mm line is left with no white at all. That is why UV DTF lines are kept at 0.5–0.6 mm or thicker.
When the fringe points in one direction
Rotate a copy of the test artwork by 90°. If the fringe stays on the same sheet edges, check the printhead registration pattern. If its marks do not line up, set the registration correction in the printer control software and repeat the test. We walk through the order — feed step, head spacing, bidirectional printing — in One-sided white shadow on a DTF print: how to align the layers. If the edge rotates with the design, the cause is in the file: check the artwork and the white layer preview.
White shows only on the left and at the bottom: this is white shifted against the colour, not an oversized underbase.
Do not hide a one-sided shift with a heavy choke: on the opposite side the colour already lacks white, and the choke removes even more. Correct the registration first.
Frequently asked questions
How many pixels should I choke the white?
Work in millimetres: start at 0.1 mm and add 0.1 mm per test. In a 300 ppi file that is about 1 pixel; at 720 dpi it is about 3. Under small text, do not choke by more than 0.1 mm.
Is a clear glossy border around the decal a defect?
No, it is varnish: it is often printed 0.2–0.25 mm wider than the design to seal the edge. If the border gets in the way, reduce the varnish extension in your software; without it the edge is sharpest but less protected.
What can I do with transfers that already have a printed white edge?
The white edge is not visible on white and light-coloured items, so use the transfers there. For dark and clear items, reprint: neither lamination nor pressure will remove the edge.
Why is small text pale or failing to transfer after choking?
The choke removed white under the thin lines. For small text, return the choke to 0–0.1 mm, thicken the artwork lines to 0.5–0.6 mm and make the letters at least 2 mm tall.
How do I remove a white halo left after removing an image background?
Place the image on a black background and zoom in: the pale fringe is semi-transparent pixels, and white is printed under them. Contract the design selection by 1–2 pixels and delete everything outside it to clean the edge.