

A pale band beside a seam or zipper usually means the platen is resting on the raised area and not pressing the fabric next to it firmly enough. Move the seam and zipper beyond the platen edge, keeping the whole design on flat fabric; if it is larger, put a PTFE heat press pillow inside the cover. Keep the temperature and time unchanged.
A raised seam holds the platen above the fabric
The solid fill is even on the sublimation paper, but colour is missing near the seam after transfer onto the sublimation pillowcase. A seam allowance folded into several layers sits higher than the main fabric. The platen rests on that raised area, leaving weaker pressure beside it. The transfer can come out pale or incomplete; when all the edges are thick, the middle can come out pale.
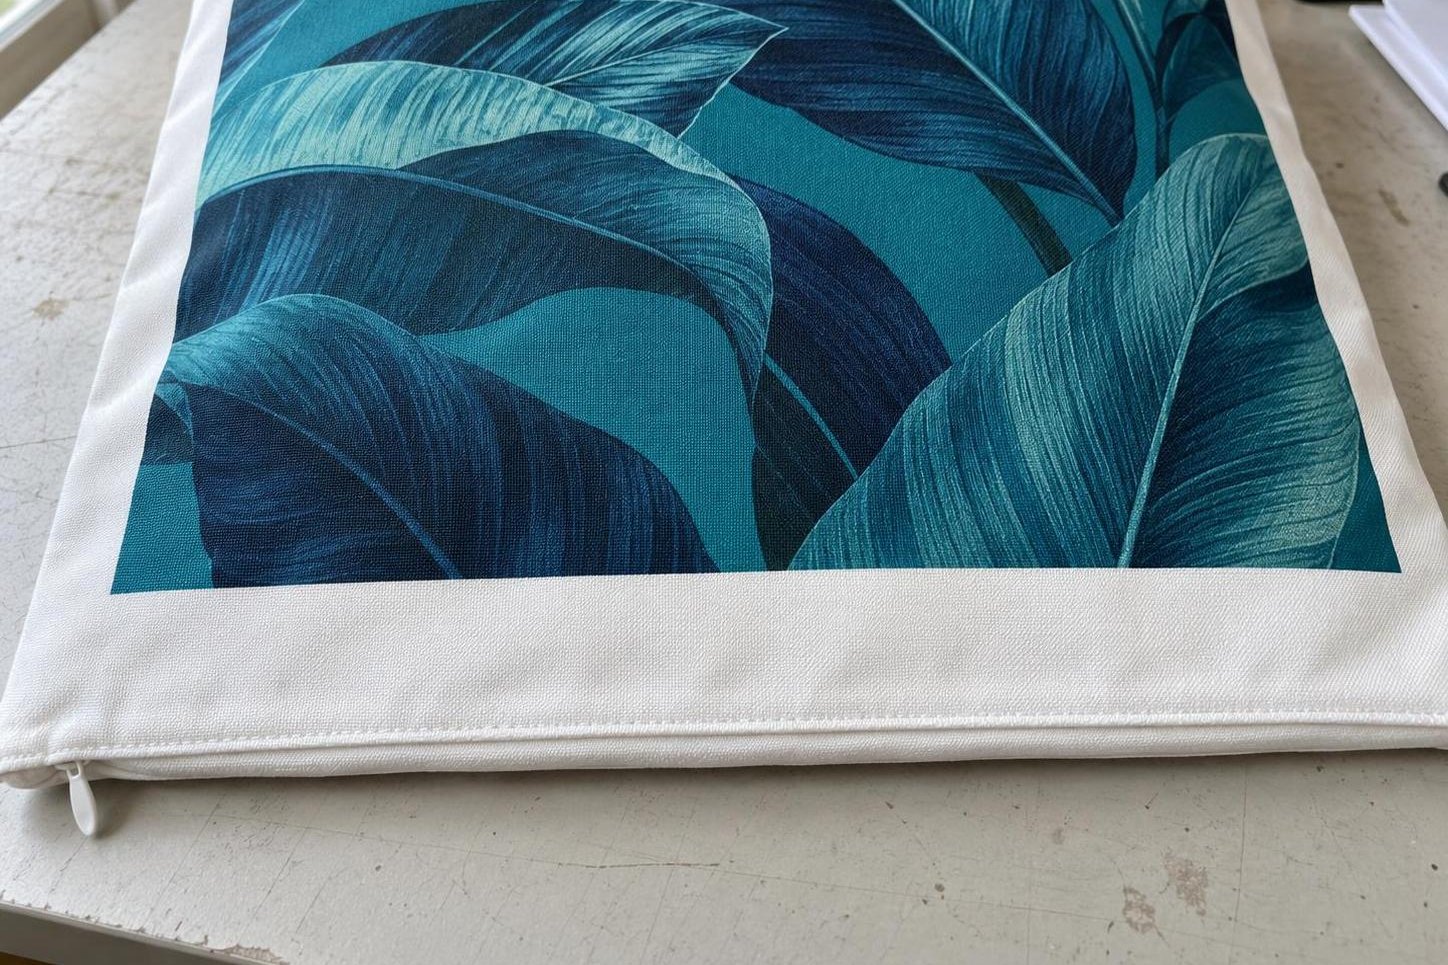
Right: the colour is even right to the edge of the design, next to the zipper seam too.
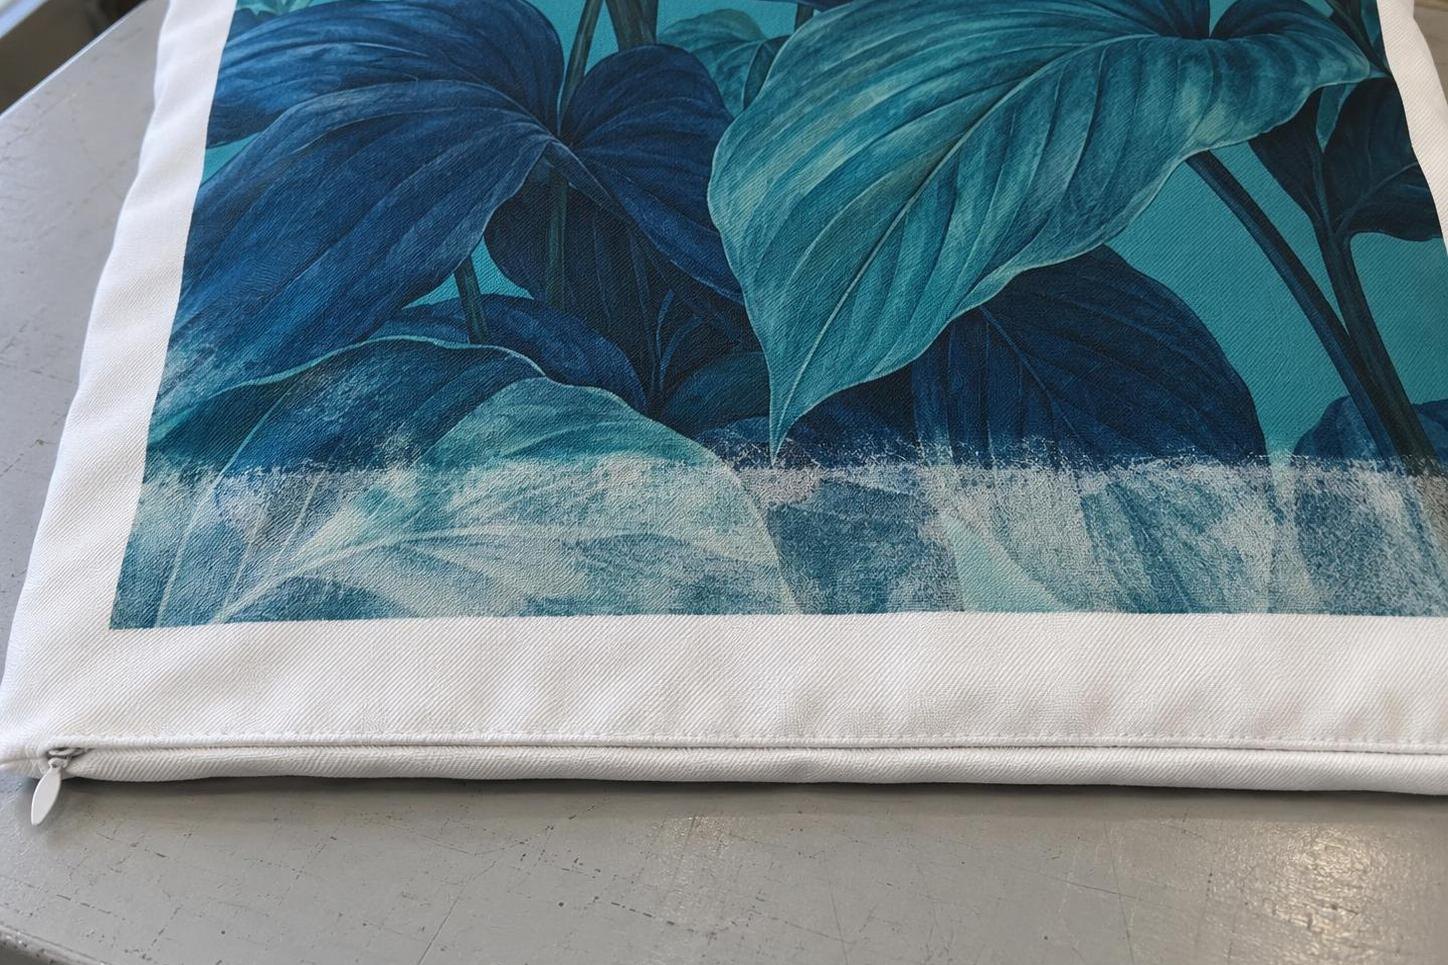
Wrong: a pale, patchy band along the bottom of the design, beside the zipper seam.
You cannot see this from the front: an allowance may have folded inside, or the zipper may have tucked under the print area. Before pressing, run your palm over both sides of the empty cover where the design will go.
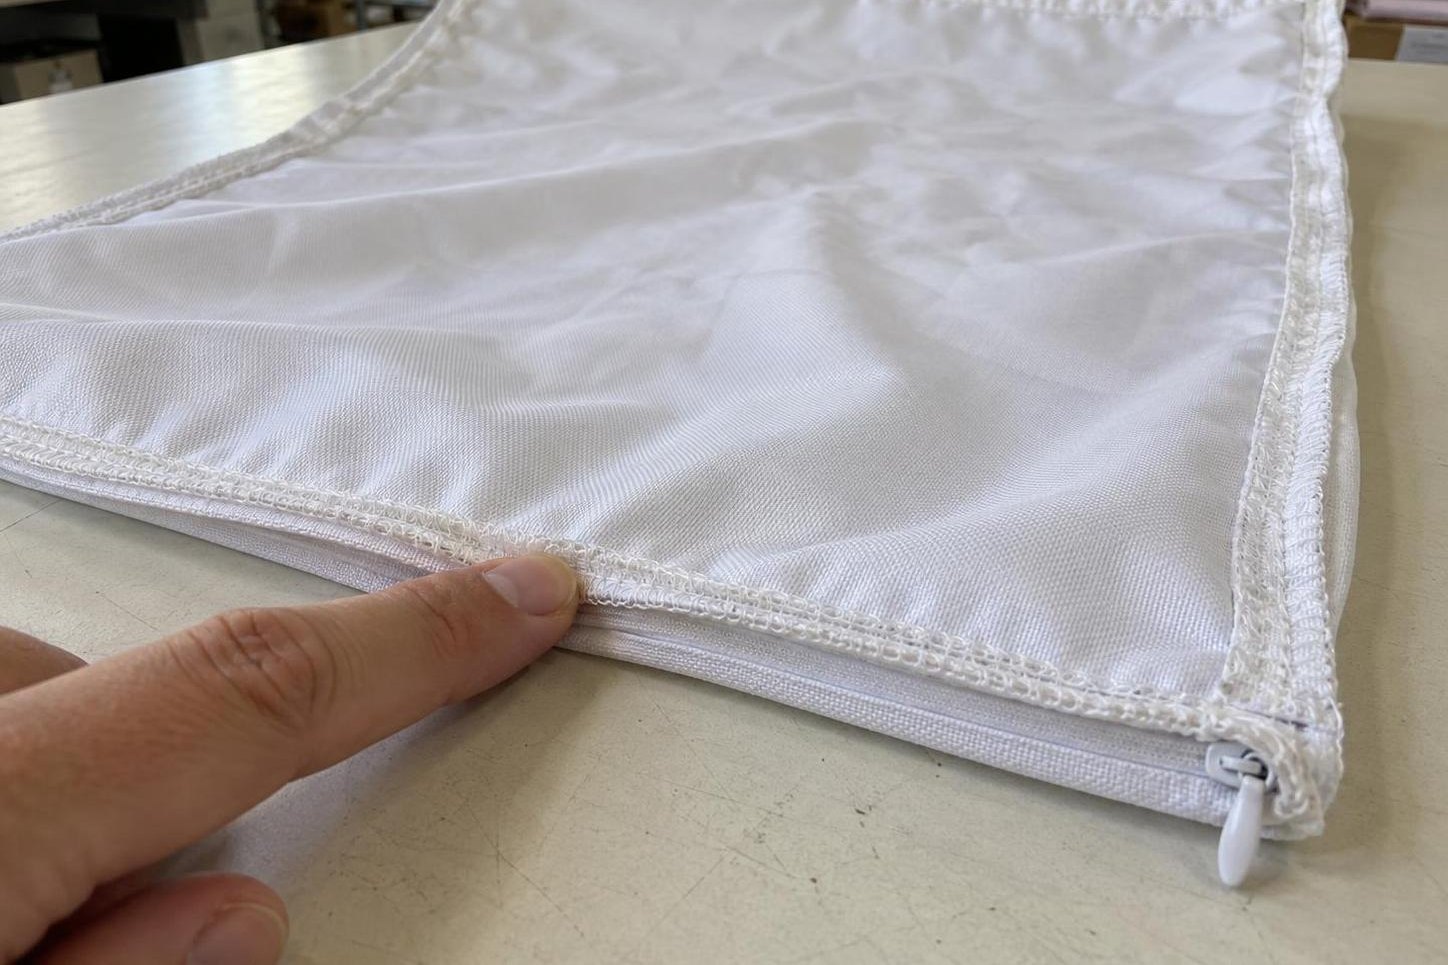
The cover inside out: overlocked allowances along the edges, the zipper in the bottom seam. This is the thickness that holds the platen up.
What changes under the platen
Seam under the platen
Colour may not transfer fully beside the seam.
Seam moved beyond the edge
Within the print area, the layers lie flat against each other.
Cross-section through the print area: the raised seam prevents even contact.
Do not force the handle down harder to flatten the seam: the platen will leave a mark on polyester, and the band will remain. Extra seconds will not help either.
Check the fit on a cold press
The whole design must lie on flat fabric under the platen of the flat heat press. The pillow size is not its printable area: seams and the zipper take up part of it.
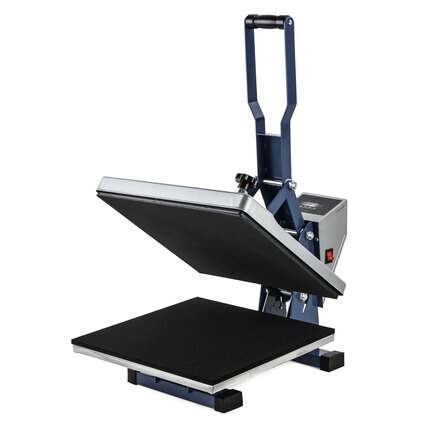
HP380A NEW flat heat press, 38 × 38 cm
38 × 38 cm platen · 0–230 °C · 1–999 s timer · the product card lists pillow printing
- Remove the filling. Unzip and flatten the cover. Check the back: there must be no crease or folded seam allowance beneath the print area.
- Move raised features beyond the edge. With the press cold, position the cover so the zipper, slider and thick seam hang beyond the lower platen and clear of the upper platen. Check the other seams under the platen as well.
- Check the design footprint. Lay down a paper template the same size as the design. The entire template must have flat support underneath and be fully covered by the upper platen.
- If the design does not fit between the seams, or the platen is larger than the cover, raise the print area. Put a PTFE heat press pillow smaller than the cover inside it and lay a sheet of protective paper on top. The seams end up beyond its edges, lower than the design, and the platen presses the whole design. Without a pillow, reduce or move the artwork. Do not leave part of the design beyond the platen edge.
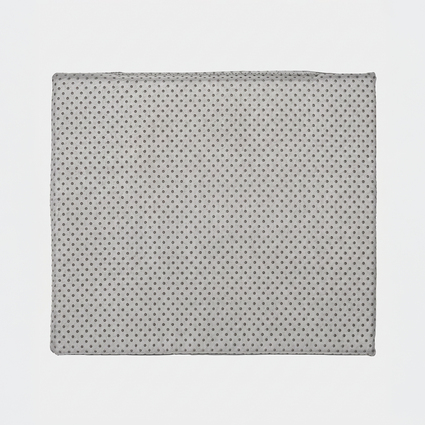
PTFE heat press pillow, 29 × 38 cm
PTFE and foam · place inside a 40 × 40 cm cover, beneath the design
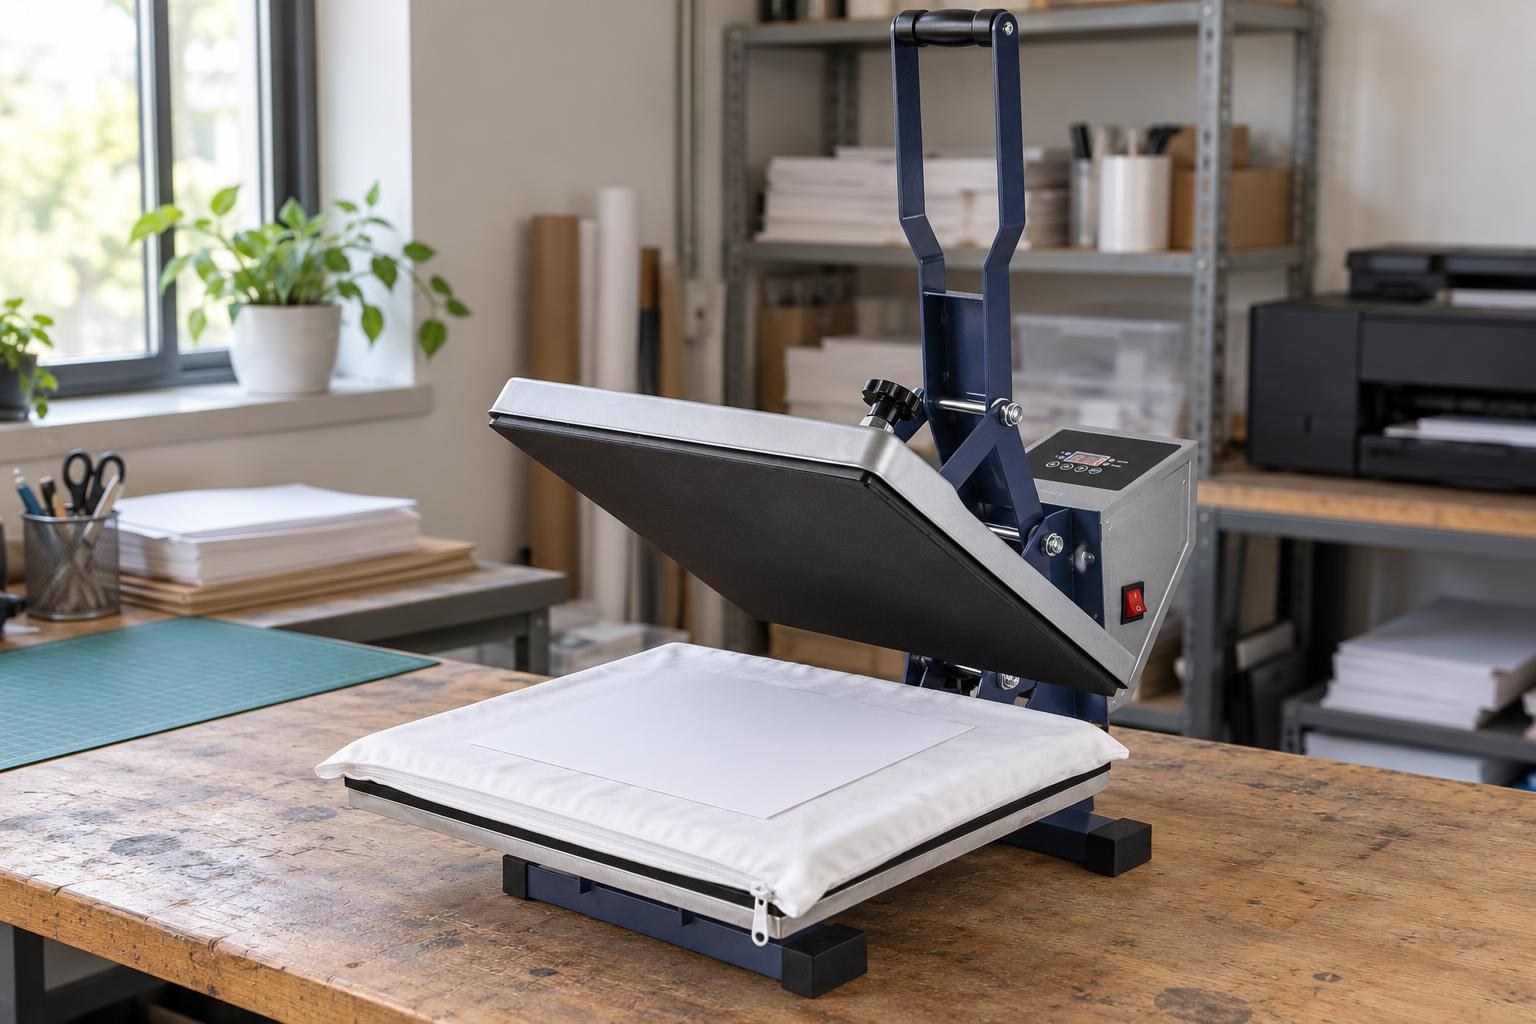
Fitting on a cold press: the zipper edge hangs over the lower platen, and the design template lies fully on flat fabric.
Set the margin using the actual cover: find the end of the internal seam allowance and keep the design on flat fabric. A thin sheet of protective paper does not level a thick seam.
Example fit. A 40 × 40 cm cover on a press with a 38 × 38 cm platen: centre it, and the seams and zipper lie along the platen edges. A 30 × 30 cm square fits on the flat fabric with room to spare; a 38 × 38 cm one does not, its edges would lie on the seams. Go by the flat fabric between the seams, not by the cover's outer 40 × 40 cm.
Test the new position with a fresh transfer
Use a new identical cover and a fresh transfer of the same artwork. Change only the loading. Pre-press the cover for 3–5 s without the transfer, lift the platen to release steam, and let the fabric cool for a few seconds — see “Pale patches after sublimation” for details. Put a fresh, uncreased sheet of protective paper inside. Secure the dry transfer to the fabric with heat tape, ink side down, cover the whole platen with a fresh sheet, and press. Compare once the cover has cooled. Keep the settings unchanged:
Temperature
190–200 °C
do not raise it to fix the band
Time
45–60 s
extra seconds will not remove the band
Pressure
medium
do not force the seam flat
Pre-press without transfer
3–5 s
dense fabric: up to 10 s
Gabardine or twill cover, 40 × 40 cm, on a flat heat press. Settings come from the MyPrint table for dense polyester; use the first cover of the batch as a test.
If a large design does not fit between the seams, press it with the PTFE pillow inside: the whole design must sit on the pillow, with the seams beyond its edges. Test a new layout on the first cover of the batch.
Frequently asked questions
What should go inside the pillowcase?
A fresh sheet of protective paper larger than the design catches dye that passes through the fabric to the back. With a PTFE pillow inside, place the paper on top of it, under the front fabric, to keep dye off the pillow and the next cover.
What artwork size should I use for a 40 × 40 cm pillow?
With a 38 × 38 cm platen, use up to 30 × 30 cm: the whole design must sit on flat fabric between the seams. With a 29 × 38 cm PTFE pillow inside, keep the design up to 29 cm wide and entirely on the pillow. Before the batch, check a paper template against the cover.
Should I add temperature or time if the print is pale by the seam?
No: the band comes from poor contact, and extra heat will leave a platen mark on polyester. Keep 190–200 °C and 45–60 s, and correct the loading.
How do I print both sides of a pillow?
Print one side at a time: let the cover cool after the first side, then turn it over. Place protective paper on the lower platen under the printed side and a fresh sheet inside. Keep the zipper edge beyond the platen both times.
Can pressing again fix the band?
No: the colour will fade further, and the platen will leave a mark on polyester. Test the corrected loading on a new cover.