
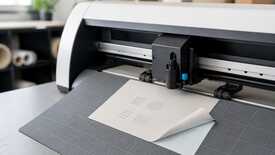
A safe test cut starts not with the “right” number, but with a new profile card for one specific film–blade–holder combination. Set the blade and starting parameters from the current instructions for your exact model, make a small test, change only one parameter per step, and accept the profile only when the film weeds cleanly and the liner is not cut through.
Treat a new film, blade, or holder as a new cutting profile
A profile belongs neither to the word “vinyl” nor to the plotter alone. It belongs to the full combination: machine model, command source, material and its lot, liner, blade, holder, and operation. Kiss-cut settings, where only the face layer is cut, cannot automatically be transferred to through-cutting or perforated cutting.
Before the carriage first moves, use the model instructions to confirm that the material is loaded straight, the pinch rollers are in permitted zones, the holder is secured, and the blade is compatible with the material and has no buildup or visible damage. Handle the blade only by the safe parts of the holder: never touch its tip.
Stop before testing
If the blade model, holder compatibility, operation type, or safe blade-setting method is unknown, do not compensate for the unknown with force. First find current instructions or supplier confirmation for this combination.
Take blade exposure and starting parameters only from documentation for this combination
First set the blade by the method specified for that holder. Excessive exposure is not a “just in case” reserve: it can cut the liner and conceal incorrect force. After the mechanical setting, select the starting force and speed from the material profile, plotter instructions, or a previously verified card for a completely identical combination.
Assess a small test mark separately on the film and the liner
Use the plotter’s built-in test if its shape and interpretation are described in the manual. For a model without such a test, prepare a small nested mark with outer and inner elements and place it only in a permitted area. It should be large enough to weed with tweezers, but it must not turn calibration into the future production artwork.
Face layer
The required element separates without a torn edge, the adjacent part of the mark stays in place, and no sections remain uncut.
Liner
It is not cut through and does not tear when the control piece is bent. A barely visible trace is acceptable only when your machine instructions define that exact criterion.
Repeatability
The same result must repeat in a second test at another permitted position on the same control strip. One successful mark does not yet prove that the profile is stable.
For one symptom, change one parameter and cut the same mark again
The liner is cut through. Reduce force by one available step and repeat the test. If the face layer stops cutting cleanly before the liner becomes safe, adjust blade exposure only according to the holder instructions and restart the cycle.
The face layer will not weed. Increase force by one available step. If missed sections appear inconsistently under unchanged conditions, stop increasing force and inspect the blade, holder, loading, and material flatness.
The contour is distorted or has uncut segments. Reduce speed by one available step and repeat the test. If the defect does not respond predictably, it is no longer a fine speed-adjustment problem.
Corners are rounded, have “hooks,” or shift. Do not correct geometry with force. This is the boundary of this procedure: check offset and corner diagnostics against the manual for the specific blade and plotter.
Save the profile card only after two identical acceptable tests
Record the plotter model, command source, date, operator, material and lot, blade and holder, actual exposure on that holder’s scale, force, speed, other active parameters, and a photo or short description of both tests. If the manual requires offset, record its value only; this card does not replace a separate geometry check.
The profile is accepted when two consecutive marks weed cleanly, the liner is not cut through, and the result does not change between permitted test positions. Replacing any element in the combination, introducing a new lot with noticeably different behaviour, or getting an unstable repeat returns the card to “test required” status.
Do not run the roll
Stop if identical tests produce different results, the liner is damaged, the material shifts, the blade or holder is unknown, or the required value falls outside the model’s permitted range. This calls for a mechanical check, documentation, or service—not more force.
After PASS, check a short production section—not the entire roll
The test mark proves the basic cut, but not the complexity of the future artwork, long feeding, or stability across the whole roll. Once the card is accepted, cut a short representative section of the job, inspect weeding and the liner, and only then release the full run.
Once the operation, material width, and profile requirements are defined, compare the required machine and consumable class in the current MyPrint section. Final compatibility still has to be confirmed by the manual, TDS, and your small test.
View MyPrint plotters and cutting materials