

For heat transfer onto a sewn tote, positioning the design between the seams is only part of the job. Its entire area needs support underneath, while the hem, side seams and handle attachments must not prevent the platen from pressing that area. If you raise the thick seams along with the print, a larger pad will not solve the problem.
When choosing heat-press pillows and pads, look beyond the bag’s overall dimensions. You need two measurements: the area of the whole print and the clear space around it. The support must also suit your press and transfer process.
What belongs beneath the print
A sewn bag has a front wall and a back wall. Internal support goes between them, directly beneath the wall receiving the image. The transfer sits outside, on top of that wall. The back wall does not disappear: when loading with an insert pad, it remains beneath the support.
The seams meet the platen first
In this example, the upper platen rests on raised areas at the bag’s edges. The gap above the transfer is visible: there is no contact with the platen here.
The support raises the print area
The intended state after compression: the upper platen touches the transfer, with the front wall and internal support beneath it. The seams at the sides stay lower. The back wall lies beneath the support on the lower platen.
Grey — press platensBlue strip — transferBrown — front and back wallsPale blue — internal supportOchre — thickened seams
Schematic cross-sections. Thicknesses are exaggerated for clarity; protective sheets are omitted. The drawing with the local pad shows contact to achieve and check in your own setup, not measured pressure.
Check more than the middle of the design. Its top, bottom and side edges must also lie over the support. Any image edge that extends beyond it will be pressed under different conditions.
Three ways to separate the print from raised features
A small lower platen: keep seams beyond its edges
If the press has a compatible small platen and allows a bag to be threaded onto it, slide the platen inside through the opening. The front wall sits on top; the back wall passes beneath the platen, outside the gap between the pressing surfaces. Leave the side seams, hem and handle attachments beyond the supporting surface, and move the loose handles out of the closing area.
This option works when the platen fits through the opening without stretching the bag, supports the whole design and lets you smooth the fabric without folds. A small size alone does not make a platen threadable: that depends on the press’s construction.
A firmer local pad: raise only the area you need
When the bag cannot be threaded onto the platen, a heat-resistant pad suitable for this application can support the print area from inside. Its edges should extend beyond the image without reaching beneath seams or handle attachments. After compression, it must retain enough height difference to keep raised features from interfering with contact in the print area.
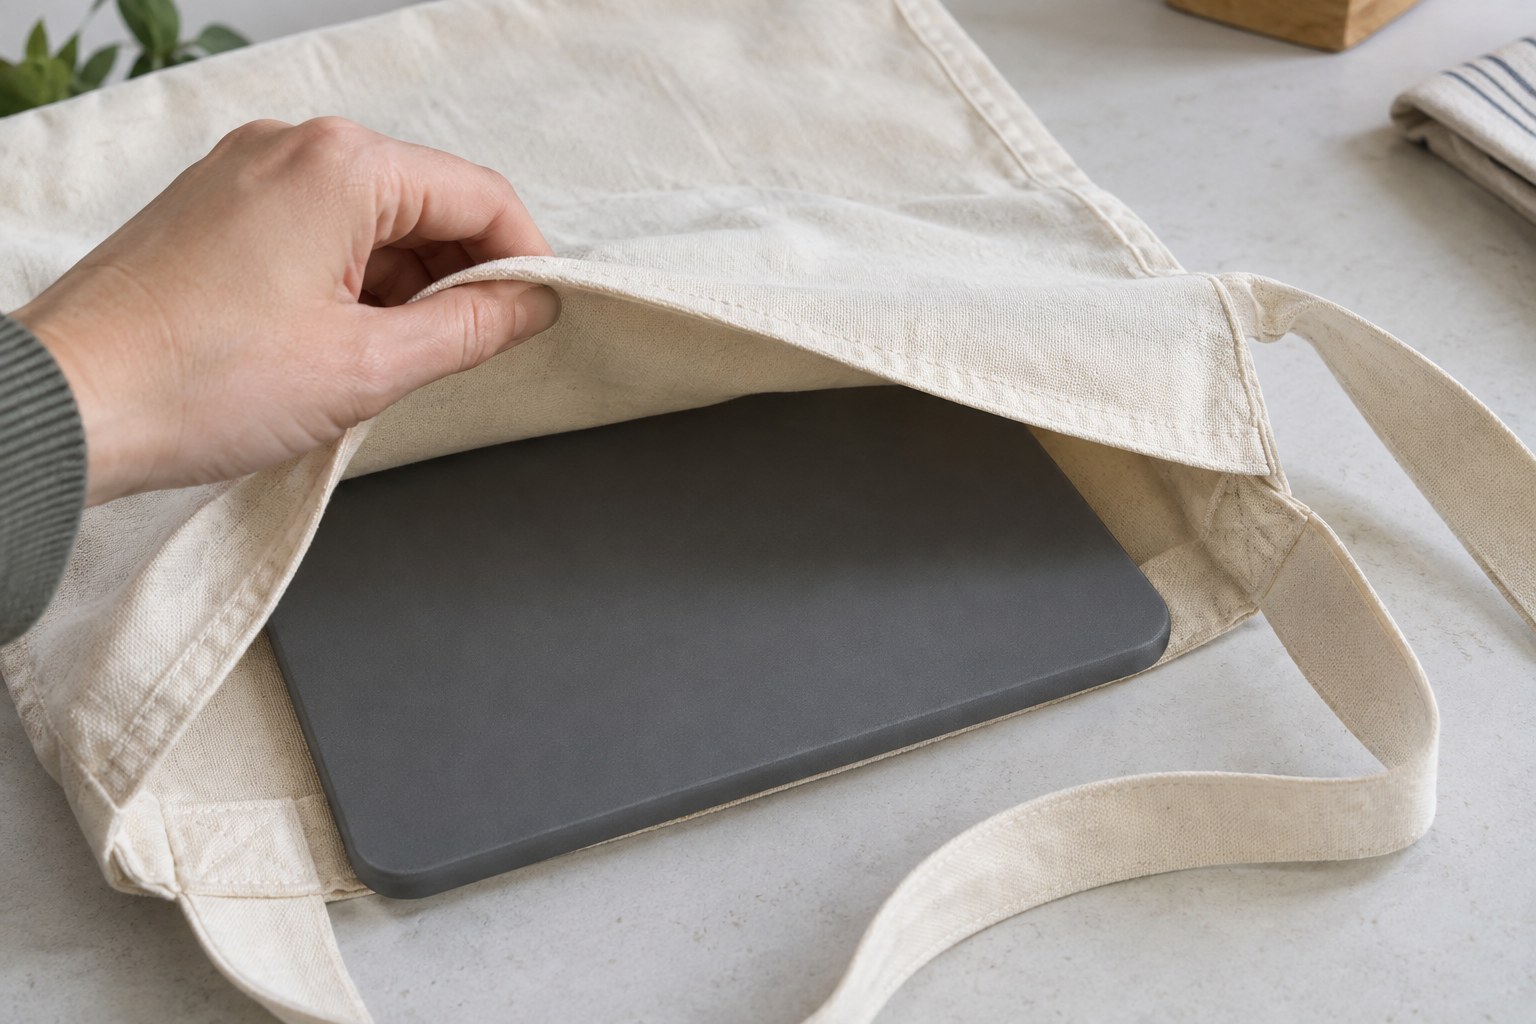
Slide the pad through the bag opening, between the front and back fabric panels.
A soft pillow: let a raised feature sink in
A pillow works differently: its compliant core can accommodate a thickened area. The support beneath the print compresses at the same time. A pillow is therefore appropriate only where your transfer process allows this kind of base. If a firmer support is required, pressing harder does not make a pillow an equivalent substitute.
Pillow: the raised feature sinks into the support
An illustrative cross-section after compression. The thickened area beside the print occupies a recess in the pillow; it has not disappeared. The pillow beneath the image is compressed too. The contact shown here depends on the actual pillow and operating conditions.
A seam running through the image itself is a different problem. An ordinary pad does not remove its surface relief. For this loading method, move or reduce the design; if that is impossible, use other suitable equipment or choose a different print position.
Is the footprint large enough? A three-rectangle example
A hypothetical teaching example. Between the nearest seams, hem and handle attachments, there is a clear rectangle measuring 24 × 28 cm. The motif occupies 18 × 22 cm. Centre a 20 × 24 cm support beneath it, with all rectangles facing the same way.
Illustrative top view: the front wall is shown transparent to reveal the support inside. Both bags and images are identical; only the support size changes. The width of the seam bands is schematic.
20 × 24 cm: every print edge is supported
Handles are moved upwards, out of the pressing area. The top band marks the hem and attachments.
The support covers the entire 18 × 22 cm motif. There is 1 cm of support beyond each print edge, and 2 cm between the support and the nearest obstruction.
28 × 32 cm: the support extends under the seams
Handles are moved upwards, out of the pressing area. The top band marks the hem and attachments.
This support extends 2 cm beyond the clear zone on every side. The red areas show its overlap with obstructions: the support will raise them along with the print again.
White — 24 × 28 cm clear zonePale blue — supportBlue — 18 × 22 cm motifOchre — seams and hem outside the clear zoneRed — support beneath an obstruction
Support margin around the print: (20 − 18) ÷ 2 = 1 cm across the width; (24 − 22) ÷ 2 = 1 cm along the height.
Clearance between support and obstructions: (24 − 20) ÷ 2 = 2 cm across the width; (28 − 24) ÷ 2 = 2 cm along the height.
These 1 cm and 2 cm gaps follow from the chosen dimensions; they are not required margins for every bag. The plan establishes only that the whole motif lies over the support and the obstructions lie beyond it. It does not show compressed height or contact uniformity, and cannot determine transfer temperature, pressure or time.
A loading check before a representative trial
- Position an outline of the whole design. On an unheated bag, locate the nearest raised features, including those inside. Check that both the motif and its support fit between them. Do not transfer the example’s dimensions to a different bag construction.
- Load the bag using your chosen method. Smooth the front wall. Make sure there is support beneath every image edge and no accidental fold in the back wall underneath it. Move the handles aside, then check the seams and support position again.
- Check closure after changing the thickness. On a cold press, use the closure check permitted for that model, keeping your hands outside the working area. Set the pressing condition according to the press instructions and transfer requirements: the previous adjustment position does not guarantee the same pressure with a new support.
- Make a trial that represents the intended job. Use a fresh bag of the same construction and material, the same transfer size and the selected support. Use the approved settings for that material pairing. Inspect the centre, all edges and corners of the print; for an adhesive transfer, also check edge adhesion as directed by that transfer system.
If the dry fit reveals an unsupported edge or a seam sitting on the pad, change the layout before heating. If the defect remains after correct loading, do not build up more pads or add heat by guesswork. When the problem repeats in the same press location, separately check platen contact and temperature. One failed print does not establish that a seam caused it.