
Turn the cutting mat over together with the sheet, print side to the table, and slowly peel the mat away while pressing the released sheet down with your palm. The mat should bend, not the stickers: then the sheet stays flat and the liner stays whole. If the liner still tears, remove an uncut offcut the same way: if it tears too, use a lighter-grip mat; if it does not, lower the blade force.
This method is for cutting plotters that cut a sheet on a flexible adhesive mat, once the outline is cleanly cut.
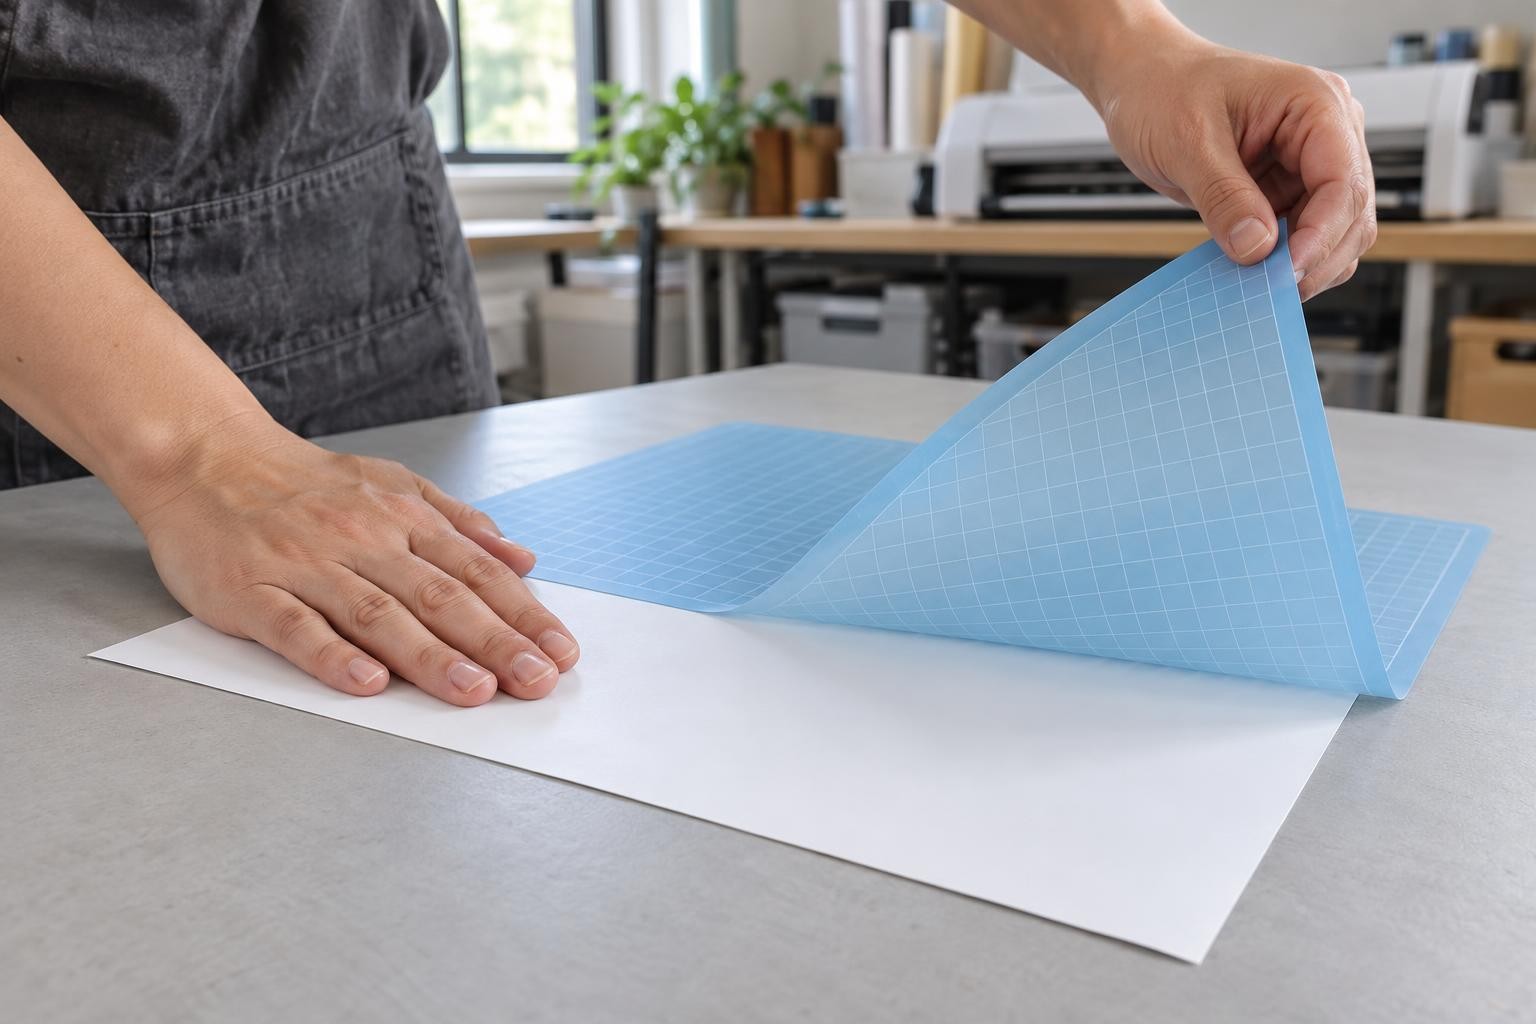
Right: the sheet lies print side down and only the mat bends.
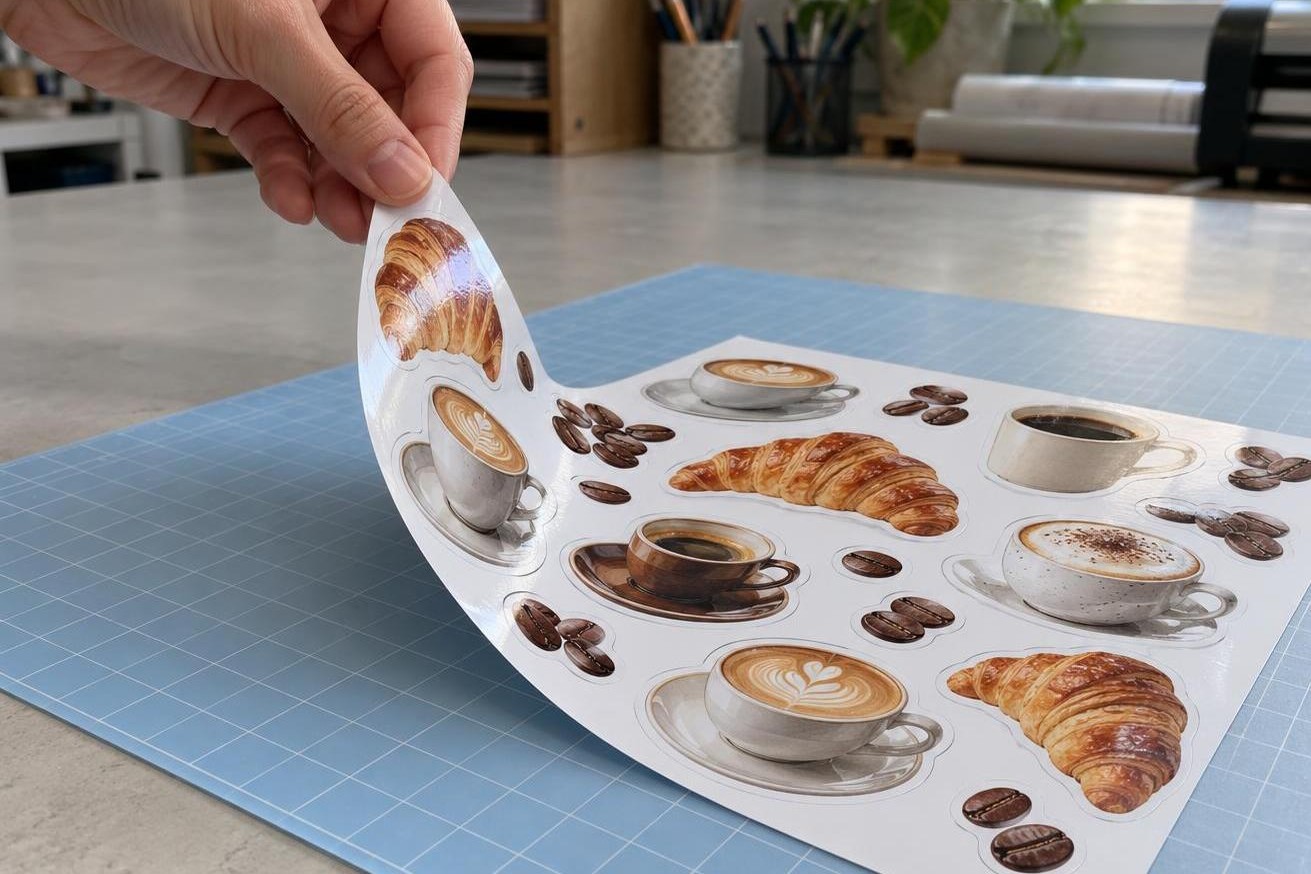
Wrong: the sheet is pulled up by a corner and curls together with the stickers.
Why the edge curls even when the cut is clean
A sticker made from self-adhesive inkjet film has its own backing liner, which covers the adhesive until application. The mat holds this liner from below. When you pull a sticker up by its edge, it bends together with the liner and stays curved after removal.
Peel the mat away a little at a time
Mat
Light
light adhesive grip
Size
30.5 × 30.5 cm
for A4; for A3, 30.5 × 61 cm
Print dries
10–15 s
dense dark areas: a few minutes
Pressing the sheet
by hand
no brayer; remove straight after cutting
Mat grip and sizes from the My Print Light cards (9213, 9216); drying time from the cards of My Print PP self-adhesive film (7759) and My Print matte self-adhesive photo paper (11709). Desktop cutter makers advise pressing the sheet by hand only and removing it straight after cutting.
- Unload the mat and place it sheet side down on a clean, dry table. The print must be dry: gently wipe it with a dry tissue; it should leave no marks.
- Bend a corner of the mat to release the edge of the sheet. Press that edge against the table and slowly move the mat up and back without creasing it.
- Move your hand along the release line while the sheet lies on the table. Peel the mat more slowly around narrow projections and small shapes.
- If a small sticker lifts with the mat, slide a flat spatula between the mat and the liner and remove the sticker together with its liner.
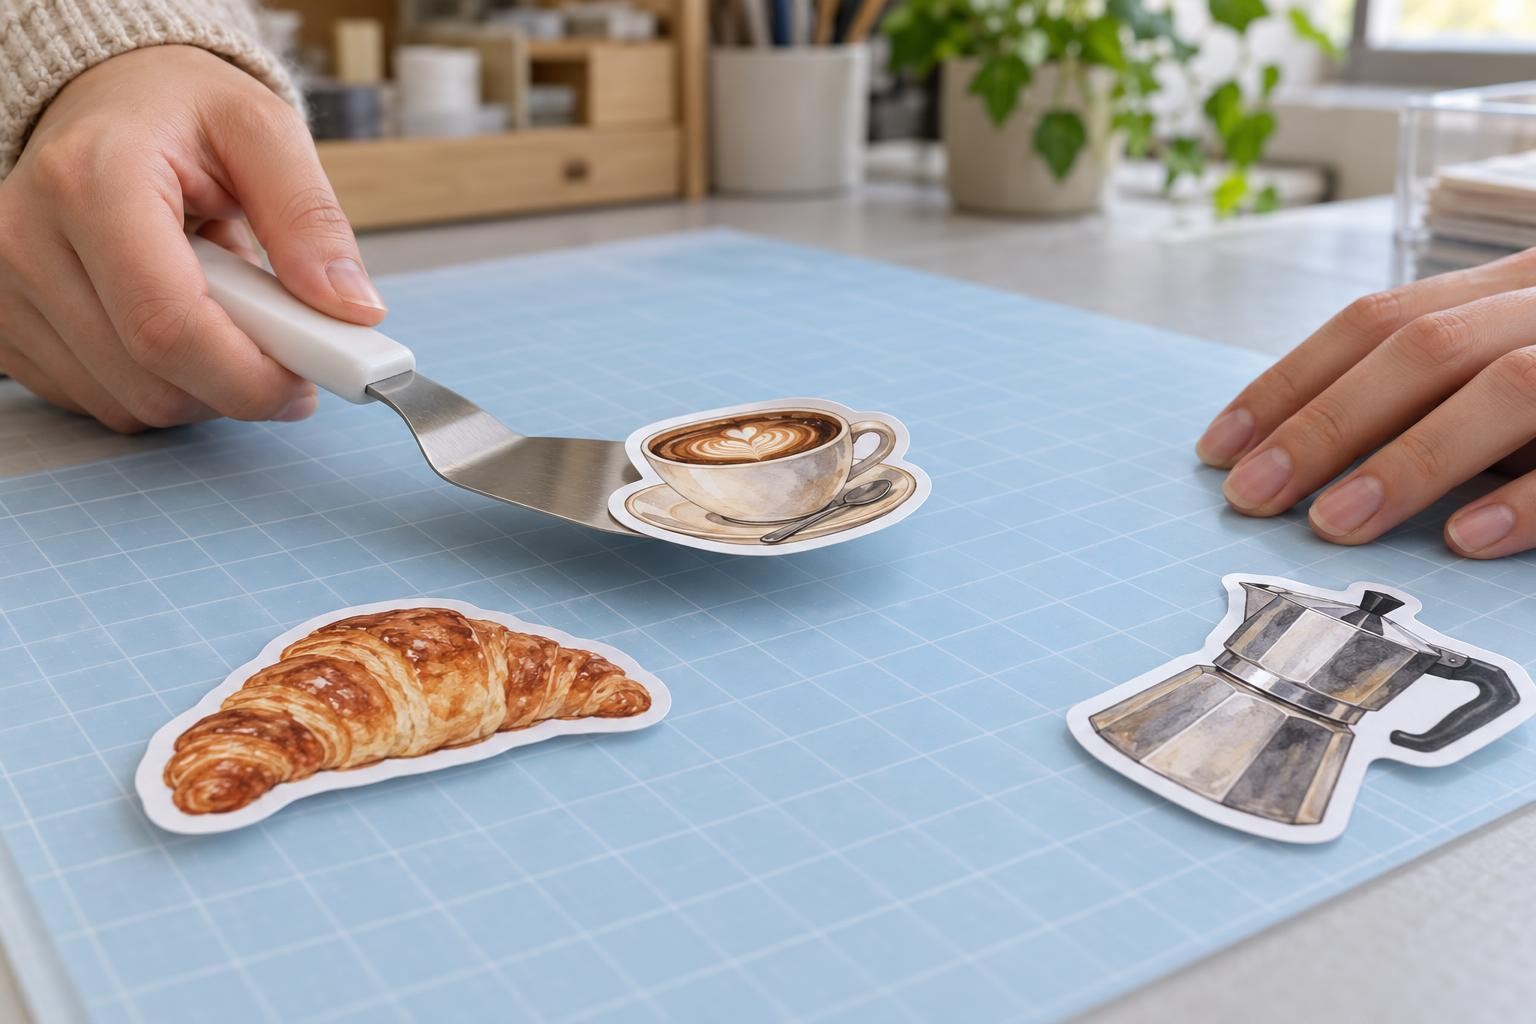
Slide the spatula under the liner of a small sticker and carry it flat.

flat spatula for small stickers · scraper for leftover bits on the mat · hook, tweezers, scissors
Separate the mat from the liner. Remove the liner from the sticker only when you are ready to apply it.
Are you removing a sheet or individual stickers?
Kiss cut: a shared liner
Separate stickers
Only the sticker layer is cut. Remove the entire sheet with its liner instead of picking up each sticker.
Through cut: separate pieces
The liner is cut too. Slide the spatula underneath each sticker and remove it together with its liner.
Stickers curled or the liner tears: what to change
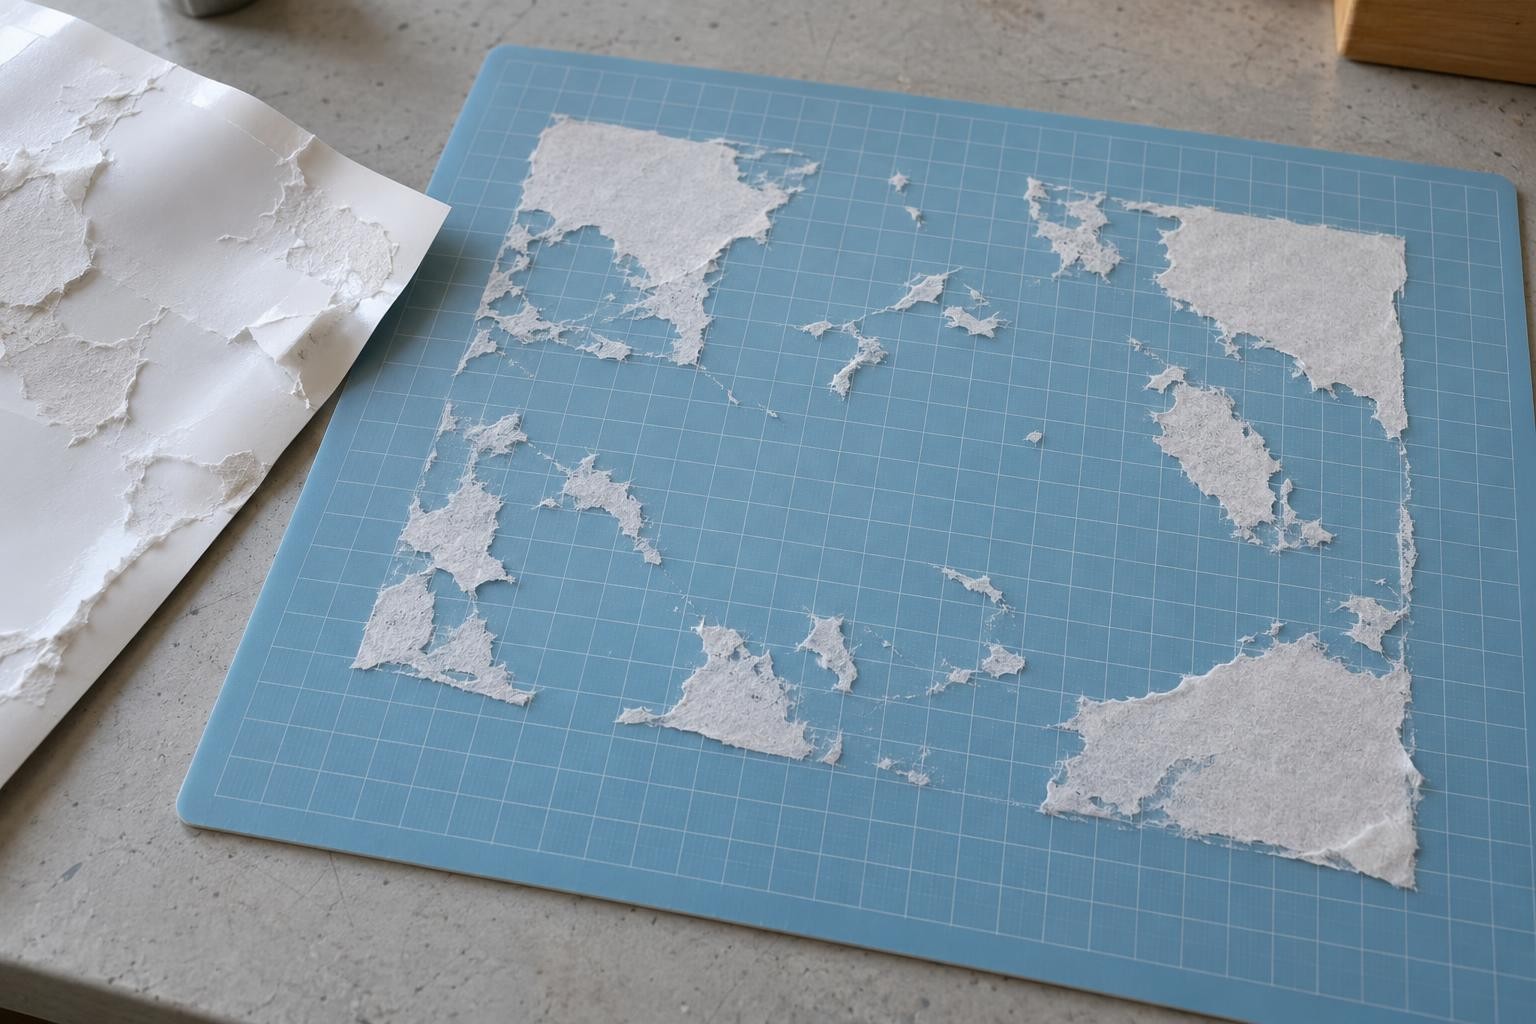
Scraps of paper liner across the whole mat: the adhesive holds it harder than the paper holds together.
Stickers intact but curved
The sheet was peeled off the mat
Turn the mat over, sheet down, and peel the mat away while pressing the sheet down with your palm, as in the steps above.
The liner tears even on an uncut offcut
The mat grips harder than the paper holds
Press the sheet down by hand only, without a brayer, and remove it straight after cutting. If that does not help, use the My Print Light mat. Check that the sheet does not shift under the blade on it; if it does, go back to the medium grip.
The offcut comes off whole, the sheet tears along the outlines
The blade is cutting into the liner
Lower the blade force by one step and make a test cut. Bend the test piece: the liner must not crack along the cut. How to find the force that keeps the liner whole: “Test cut on a plotter: how to set the blade, force and speed without wasting film”.
The sheet was curved before cutting
The curl is not from removal
The mat is not the cause. If a fresh sheet from the pack is curved too, use flat sheets and store packs closed, dry and flat. If the fresh sheet is flat, the curl came from printing or laminating: let the sheet flatten under an even weight before cutting.
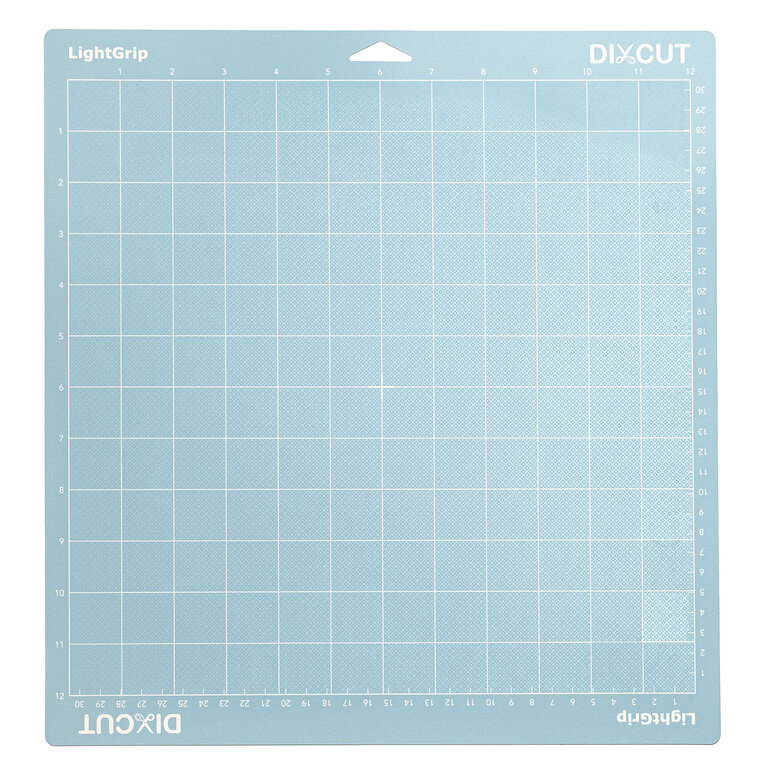
My Print Light cutting mat, light grip, 30.5 × 30.5 cm
for stickers on a thin paper liner · for A4 · for A3, Light 30.5 × 61 cm (9216)
Frequently asked questions
Will a My Print mat fit my cutter?
The mat is 30.5 cm wide, so the cutter must take material that wide. The desktop My Print SC330 (up to 330 mm) and My Print MC330 (up to 430 mm) take it. Check your cutter's manual for how to load the mat and where the pinch rollers must sit.
Which mat for stickers: Light, Medium or Strong?
For stickers on a paper liner, start with Light. If the sheet shifts under the blade, move to Medium. Strong grips hardest of all, which only harms a thin paper liner.
My stickers have already curled. Can I flatten them?
Slightly curved ones, yes: lay the sheet on a flat table liner side down, cover it with clean paper and press it under an even weight such as a stack of books. A sticker with a sharp crease will not flatten this way; reprinting it is easier.
How do I look after the mat, and when should I replace it?
After each job, scrape off offcuts and fibres, and cover the adhesive side with a protective film for storage so the adhesive does not dry out or collect dust. The scraper comes in the My Print 5-in-1 set. Replace the mat when a clean sheet shifts on it under the blade.