

To keep the whole picture on the front of a stretcher frame, add canvas around the agreed composition: one allowance for the sides and another for the rear and gripping during stretching. The picture inside the front rectangle keeps its size.
First, the photo and the front must have matching proportions. The next task is different: wrapping a three-dimensional frame without moving part of the subject onto its sides. Simply enlarging the whole photo does not achieve this.
For an eco-solvent or UV print, choose canvas for printing to suit your process, and check blank width and imageable area separately.
Three zones on one piece of canvas
Front W × H is the composition seen from the front. Side d is the canvas path across each side of the frame. Additional allowance b is the material beyond the side needed for the rear turn and gripping with the chosen fastening method. Allowance b is separate from the visible side width.
Example: a 300 × 400 mm front
For this hypothetical calculation, use a frame with a straight profile, a side path of d = 20 mm and a separate rear and gripping allowance of b = 25 mm at each edge. These are the assumptions for the example. For an actual frame, determine both allowances from its profile and stretching method.
Whole blank: 390 × 490 mm
Front: 300 × 400 mm The entire original artwork stays inside.
Sides: 20 mm each The green band is added outside the front.
Rear and grip: another 25 mm each Grey represents white, unprinted stock.
The flat plan keeps the stated proportions. The inner edge of the green band folds from front to side; the outer edge turns onto the rear. The corner areas remain part of the blank.
For this straight profile, the blank is W + 2 × (d + b) wide and H + 2 × (d + b) high:
300 + 2 × (20 + 25) = 390 mm wide.
400 + 2 × (20 + 25) = 490 mm high.
The 300 × 400 mm picture is centred, with 45 mm from each outer edge of the blank to the front. If the rear allowances remain white, the image and coloured sides occupy only 340 × 440 mm: 300 + 2 × 20 and 400 + 2 × 20. This printed rectangle starts 25 mm in from each edge of the blank.
390 × 490 mm is the whole material; 340 × 440 mm is the area to print. The file may contain the whole blank with white margins, or just the image to be positioned on the media. Either way, the dimensions and offsets must stay the same.
The same right edge after wrapping
Front → fold
20 mm across the side
← 25 mm for rear and gripping
Section through the middle of the right edge, not to scale; only part of the front is shown. The canvas follows a continuous path around the profile. The 25 mm allowance is shown lying along the rear; fastening is omitted.
At the corners, the canvas folds and overlaps. Allowances from two adjacent sides meet at each corner, so the flat plan does not show the final thickness of the fold. Do not automatically cut away the corner stock: first check how it folds and fastens in your construction. Rounded profiles, tension and the space needed for gripping can change the allowance. A template fitted to the actual frame matters more than arithmetic to the nearest millimetre.
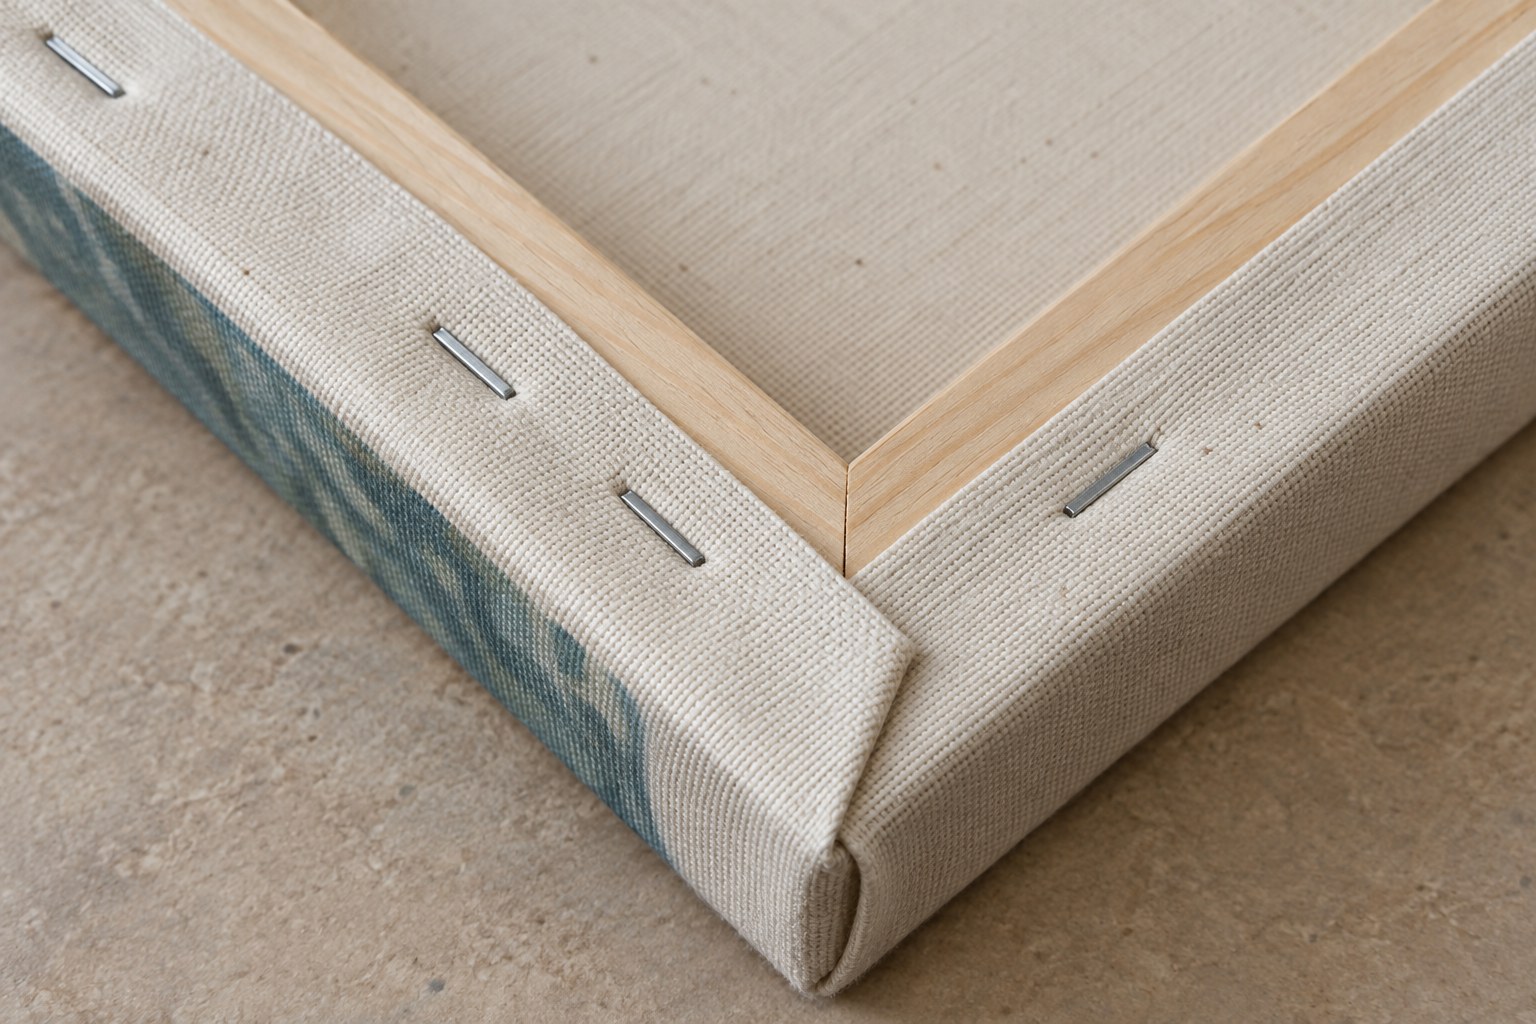
At the corner, the two allowances overlap. The fold is fastened to the back of the frame; check its bulk using your own canvas.
Mirrored or solid-colour sides
The front stays the same in both options below. A mirrored side uses a reflected strip from the edge of the photo; a solid side uses a chosen colour. If you instead enlarge the entire photograph to fill the front and sides, its details become larger and part of the original picture moves beyond the front.
Mirrored side
300 × 400 mm front + 20 mm right side
Enlarged fold boundary
Edge of front │ side
The leaf tip is repeated on the side.
Solid-colour side
300 × 400 mm front + 20 mm right side
Enlarged fold boundary
Edge of front │ side
The side contains only a flat colour.
Each view shows the whole front and the right side opened into the same plane. The rear allowance and other sides are omitted here. The enlargement below each picture reproduces the same area beside the fold.
For this artwork, choose the solid-colour side: the whole leaf stays on the front with no repeated fragment beside it.
Judge a mirrored continuation at the fold itself: a landscape without prominent edge details may look unobtrusive, while a hand, letter or part of a face may produce an unwanted repeat. For solid sides, choose a colour that suits the composition. Check the top, bottom and left edge as well as the right side shown here.
The printer has two different limits
Media acceptance
Does the printer accept this canvas and the required physical size? The example needs a 390 × 490 mm blank even when the rear allowance stays white. Check the permitted media, feed width and sheet or roll-section length.
Imageable area
Does the 340 × 440 mm rectangle fit exactly where it must be printed? Account for unprintable margins, orientation and offsets. The white rear 25 mm needs no ink, but leaving it blank does not increase the printer’s capabilities.
If the image area fits but the whole media does not, this layout cannot use that feed arrangement. If the media fits but the imageable area is too small, accepting the blank does not solve the problem either. Shrinking the whole layout changes both the front and the allowances.
Check the layout before printing
- Fix the front. Keep the agreed 300 × 400 mm photo on a separate layer. Expand the working area around it, add the sides, then the rear and gripping allowance. Keep fold guides separate from the image sent to print.
- Fit a full-size template. Align the front boundaries with the frame, wrap the sides and fold the corners. A paper template shows the layout; check actual gripping and the canvas’s behaviour under tension on a material sample.
- Check print placement. In this example, the printed area starts 25 mm from each media edge and the front starts 45 mm in. Make sure the application or driver does not fit the whole layout to the page or enlarge it automatically. Changing the DPI (dots per inch) number does not add physical material.
Before printing, you should be able to identify the picture that will stay on the front, the content on the sides and where the canvas will fasten at the rear.